Getting Started
Installation
If the plugin you want is not in the WordPress Plugin directory for some reason either because it was a paid plugin, or a non-GPL plugin, then this option is the best choice for you.
First you would need to download the plugin from wpsofts.com (which will be a zip file), then go to your WordPress admin panel. Click on Plugins » Add New. Then click on the Upload Plugin button.
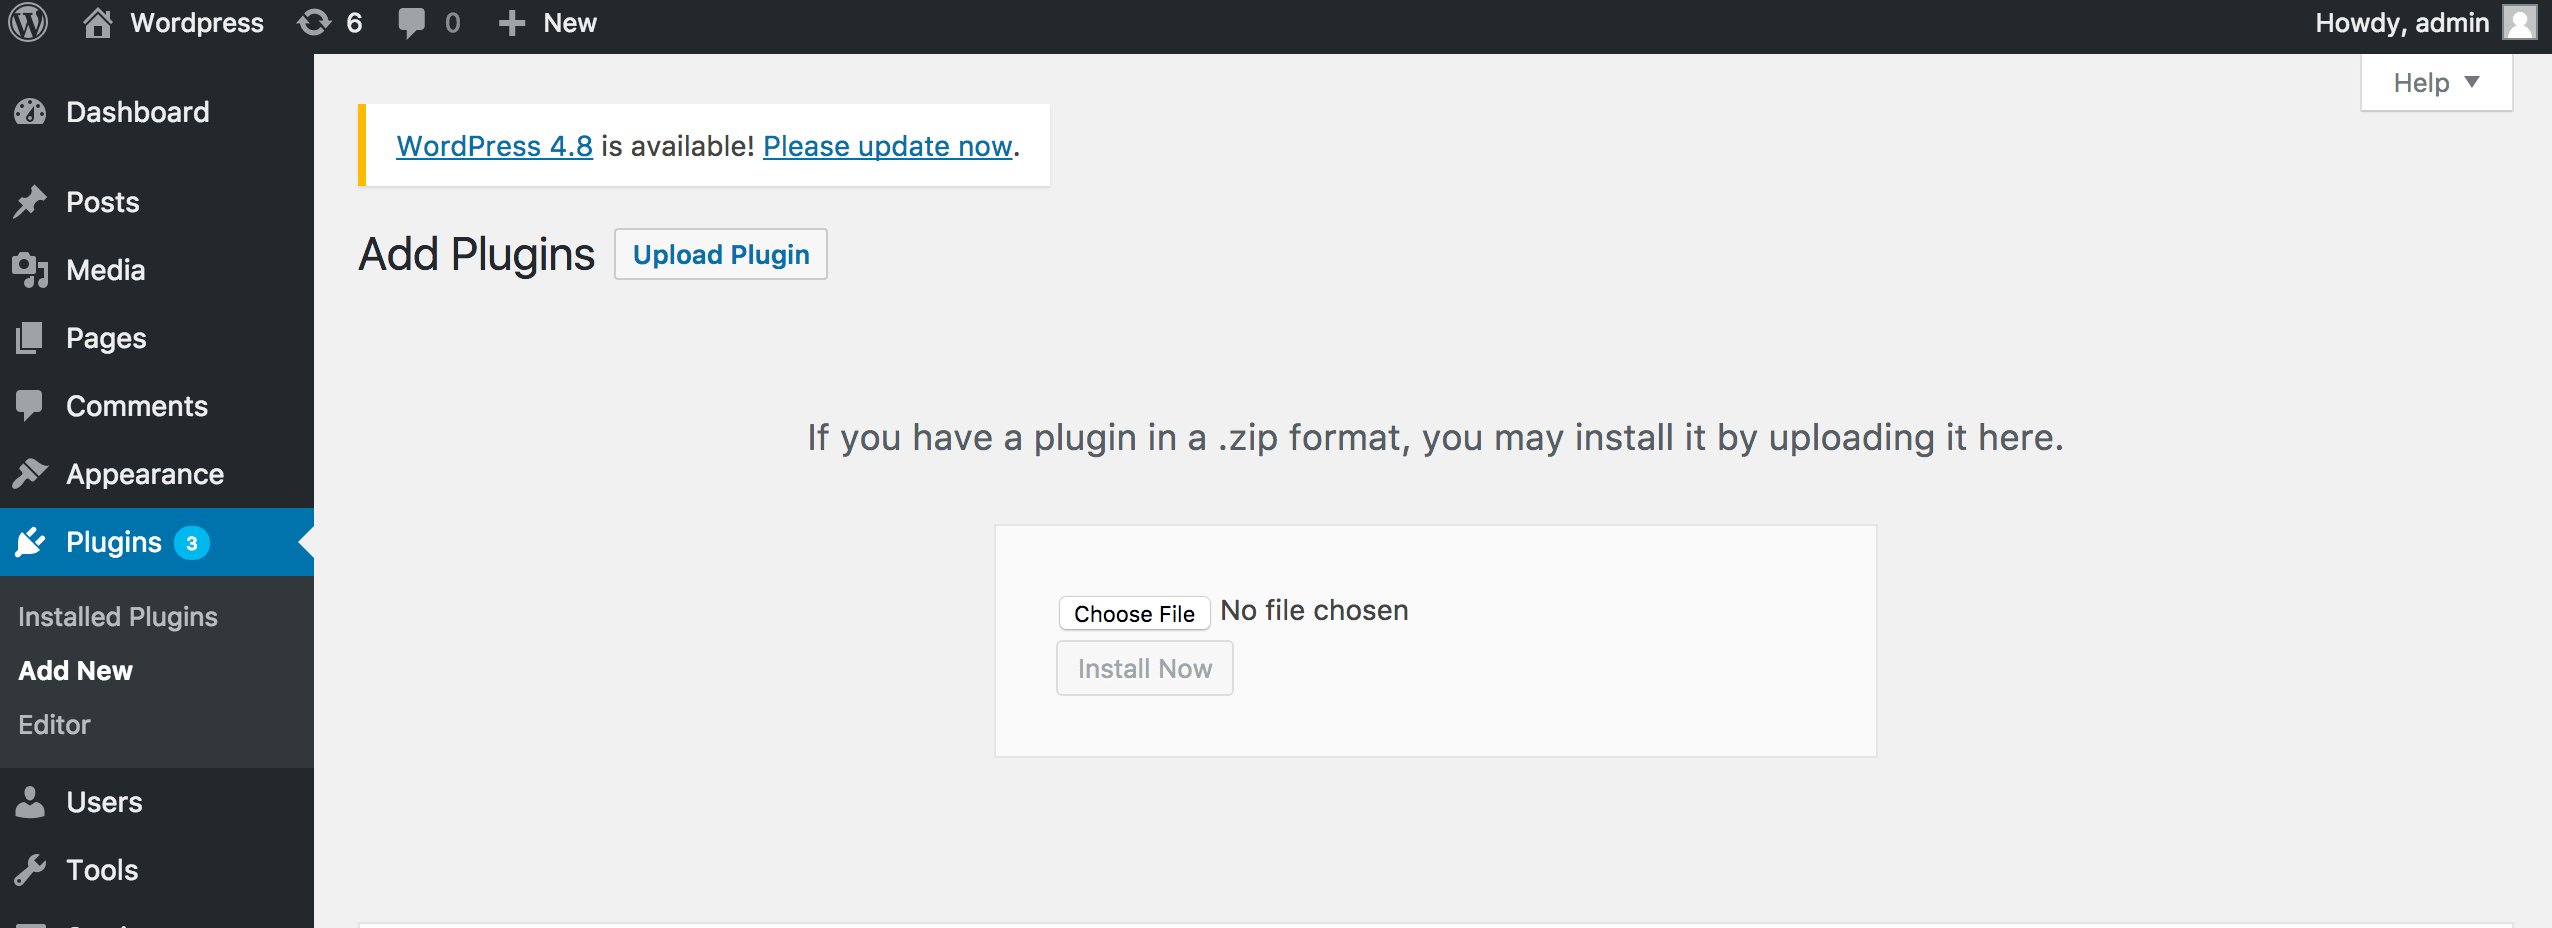
You will see a screen like the one above. Browse the file and upload it (zip files only). You will be taken to the activate a plugin page just like this one:
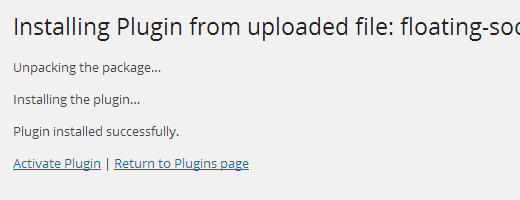
Make sure that you click on Activate the plugin, now you have installed the WordPress plugin. You would have to configure the settings to fit your needs.
Plugin Usage
Create Grid
Now let's go through the following steps to create a new grid from the scratch.
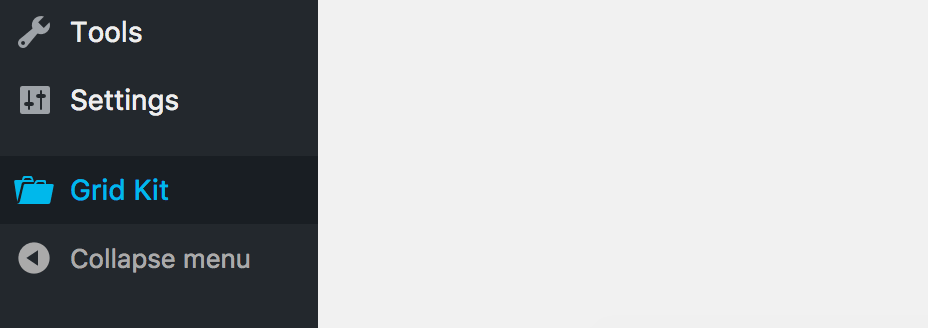
- Press "Grid Kit" menu item from the sidebar:
- You'll see plugin's dashboard screen where will be listed all your grids:

- Now you can create a grid in album style by clicking "+ Add new Album" or create a grid like a gallery by clicking "+Add new gallery" button.
Create Album
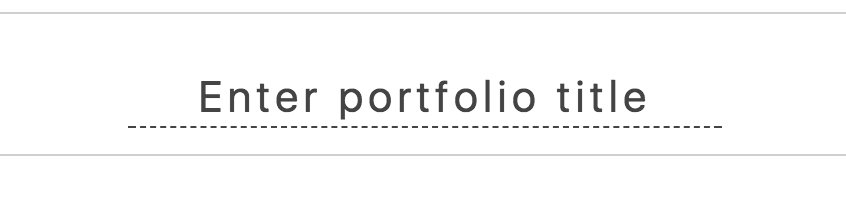
When you click on the "+ Add new Album" button, you will see an empty composer where you're gonna add all the portfolio related projects:
- Entitle just added portfolio:
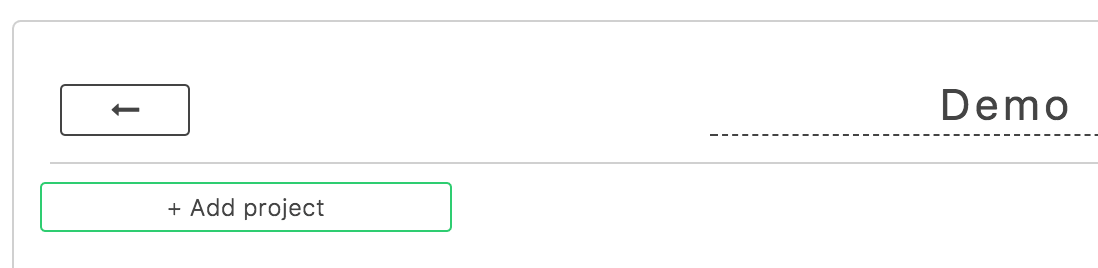
- To add a new project press "+Add Project" button:
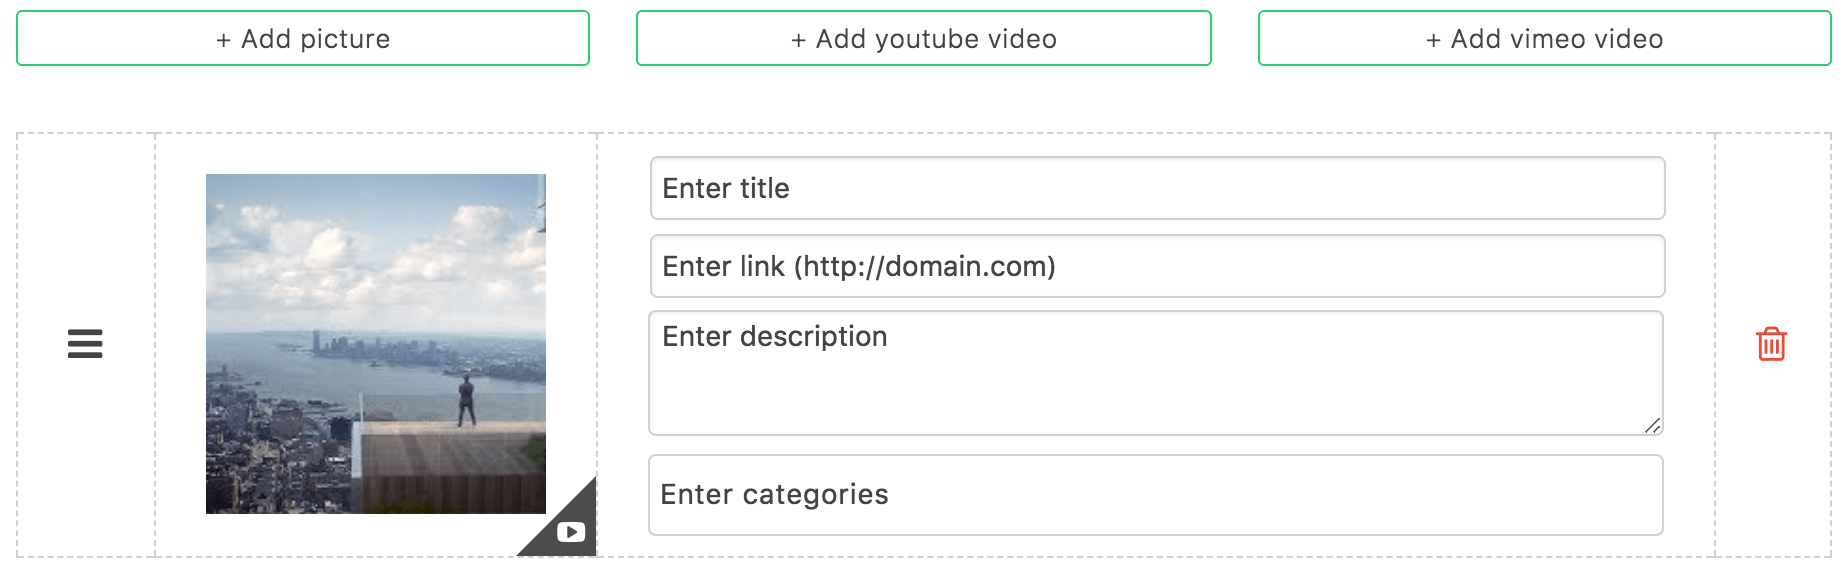
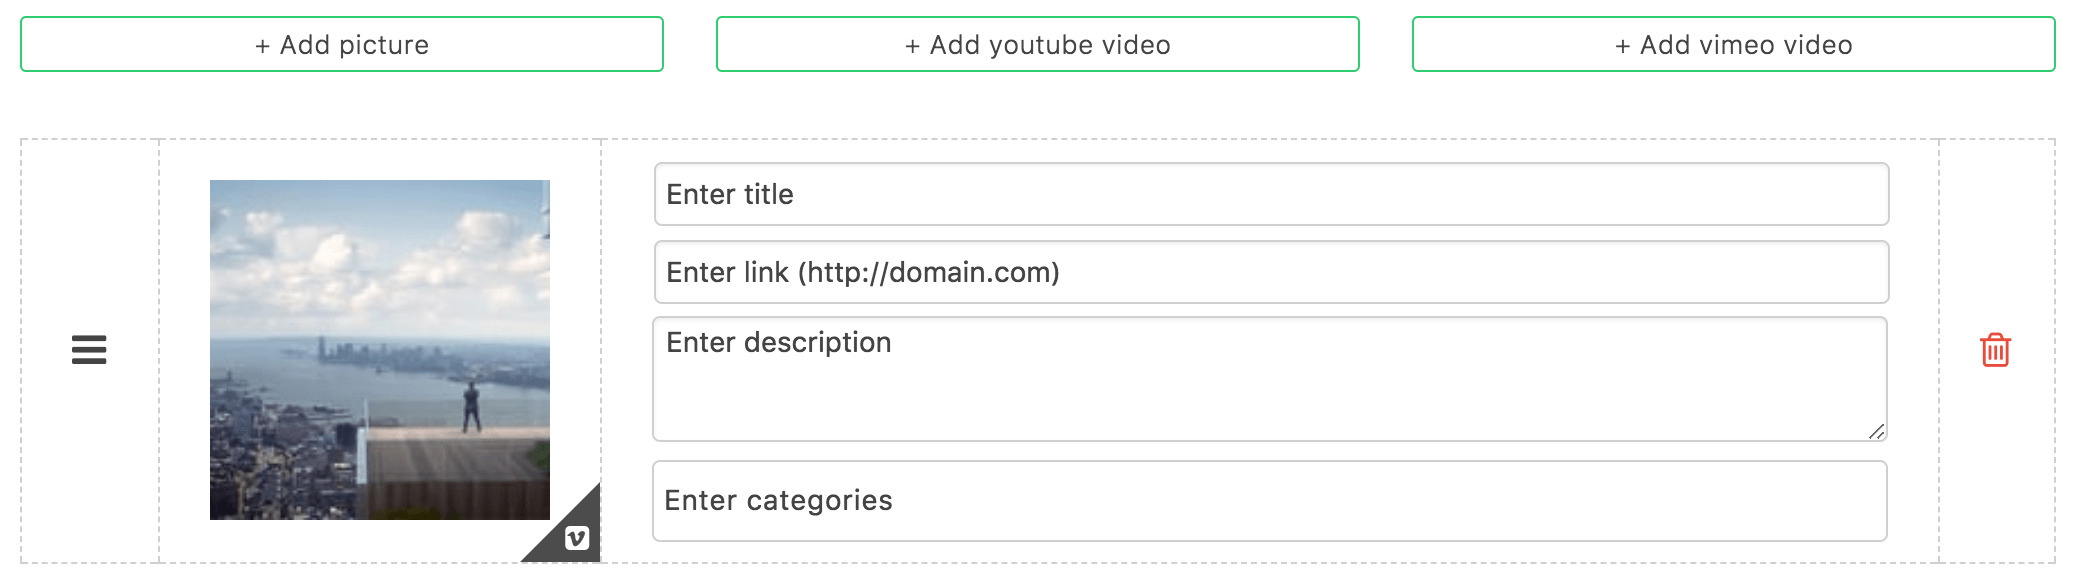
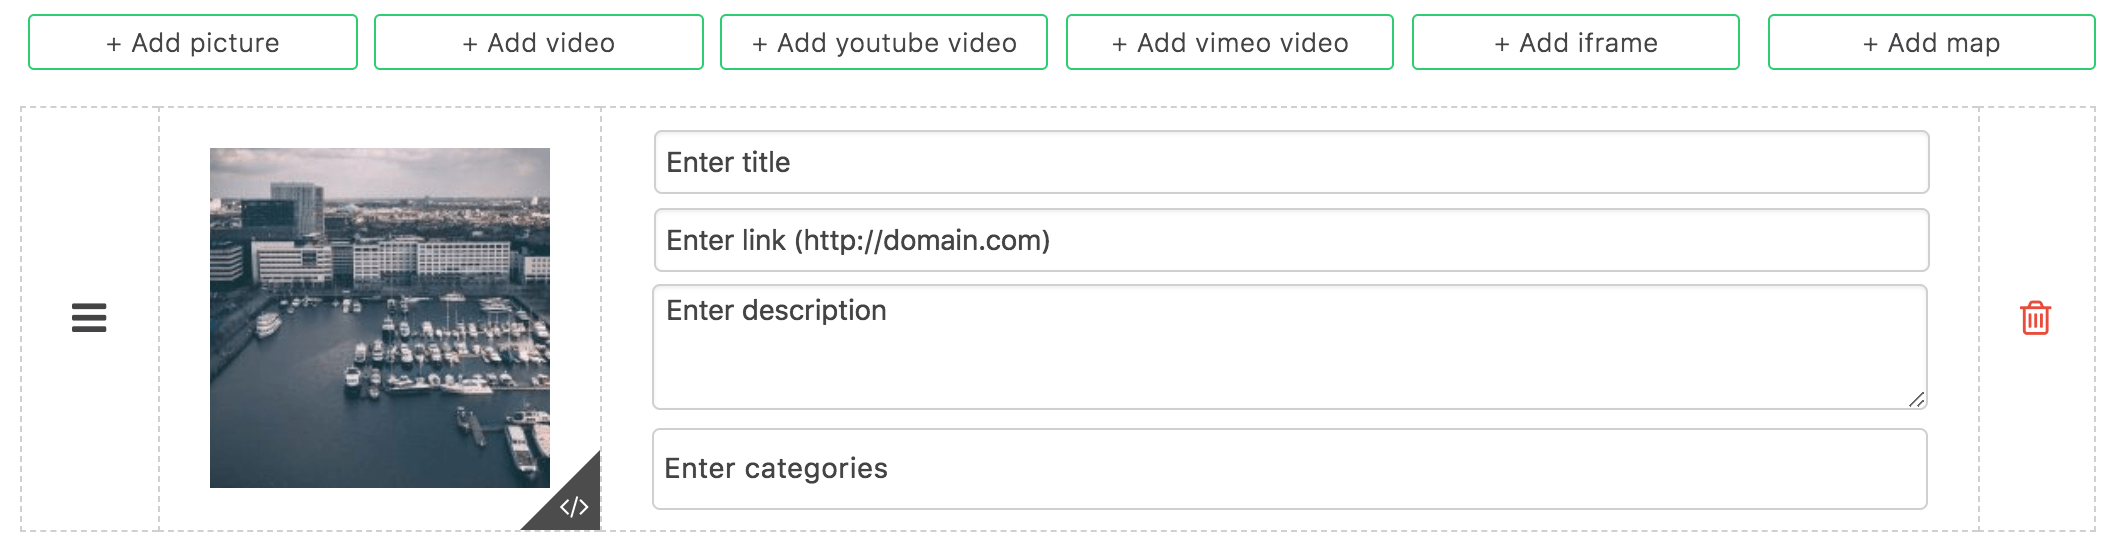
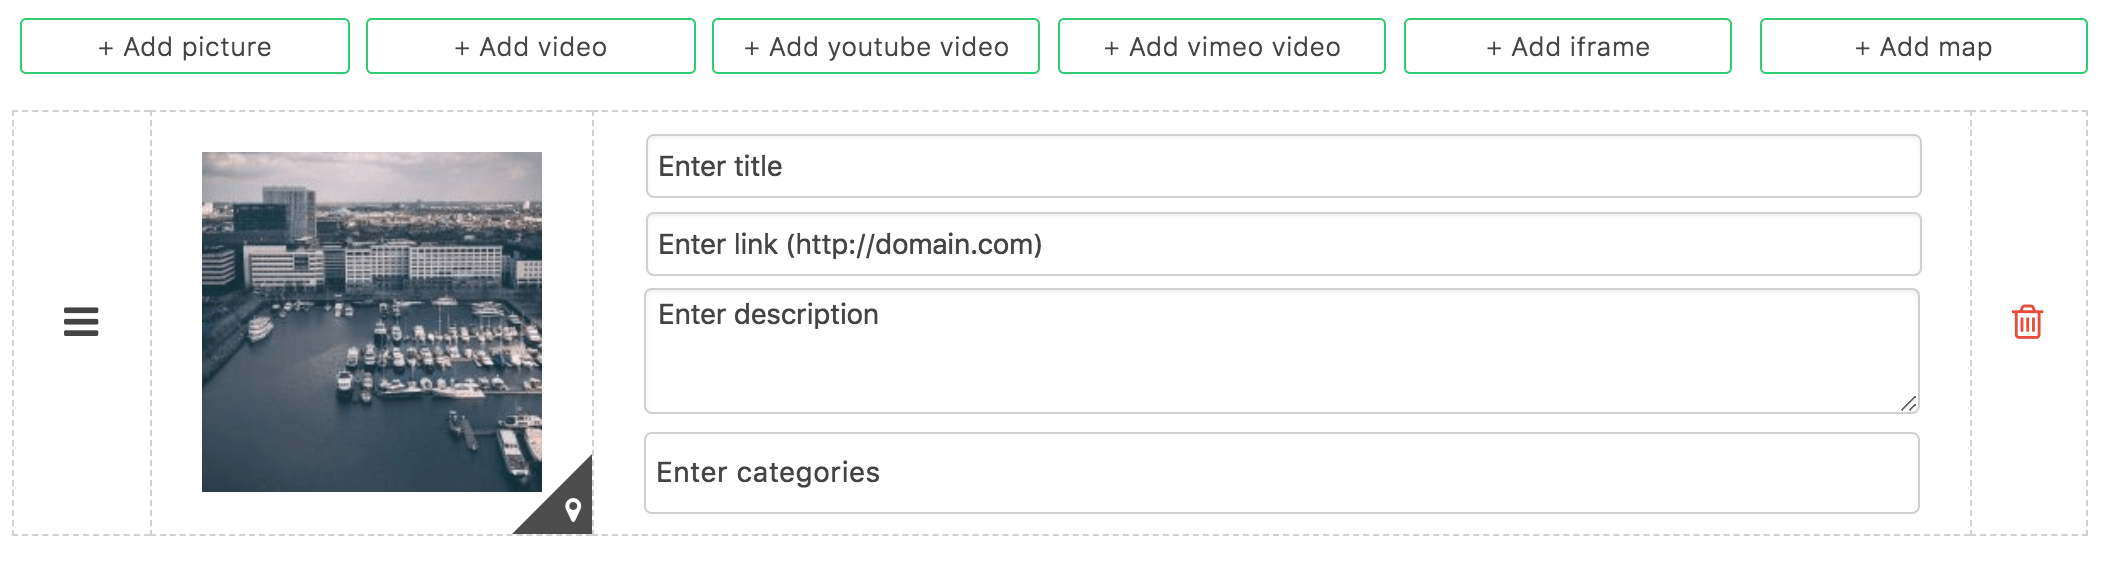
- You'll see an empty project view where you should fill the project's details:
- Fill the information about project - you can enter a title, description and a url if it has. Also you can assign categories to the project (checkout the guide to categorize projects).
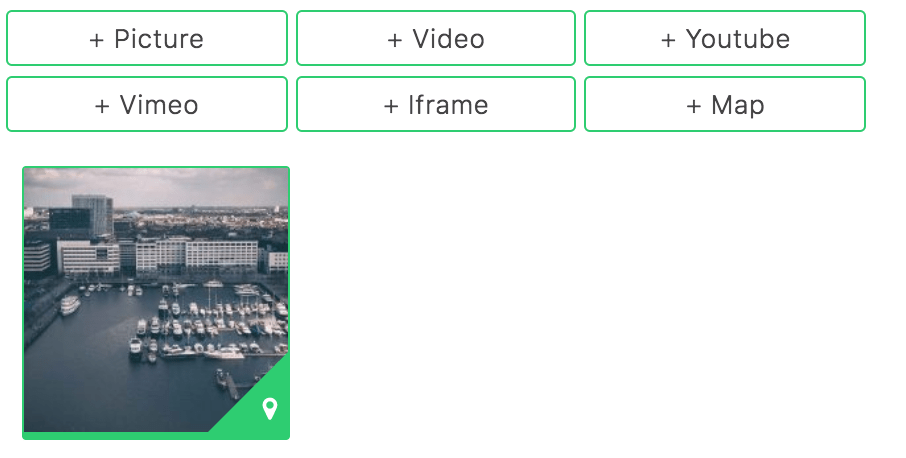
- Add pictures, videos, Youtube videos, Vimeo videos, iFrames and maps to your project.
Go to "Add attachments" section to see how to add each of them.
- After you've added items, you can set one of them as a featured item for a project.
The thumbnail of featured item will be shown in the layout.
By default the first one will be chosen, but you can set another one just by clicking on it. The featured item is highlighted by green frame and it is also shown below the title.
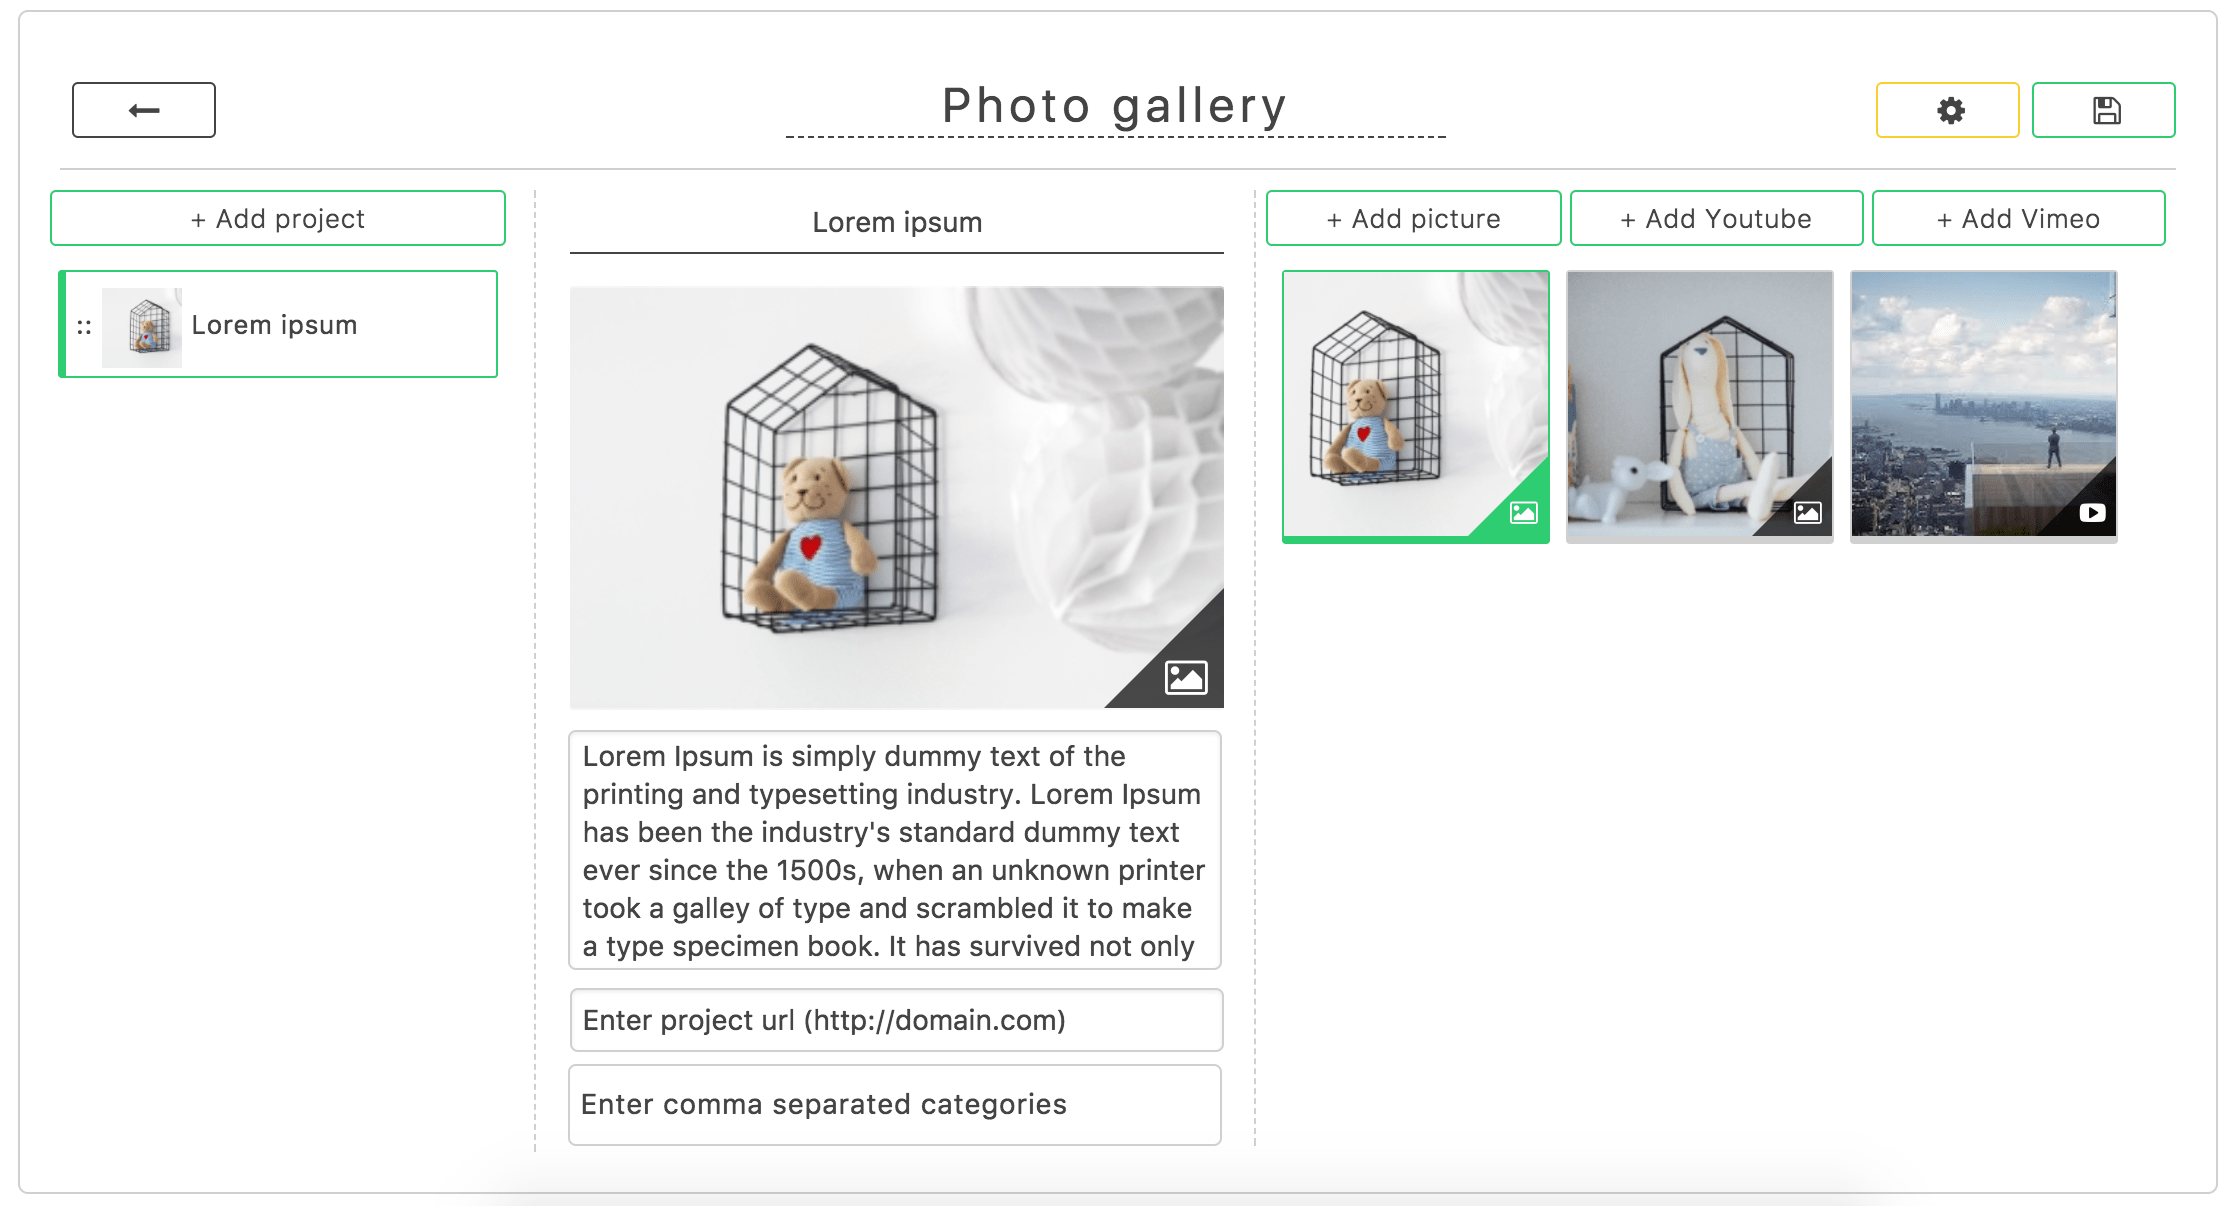
In the right-bottom corner of each item you can see an icon which shows whether that item is image, youtube video or a vimeo video.
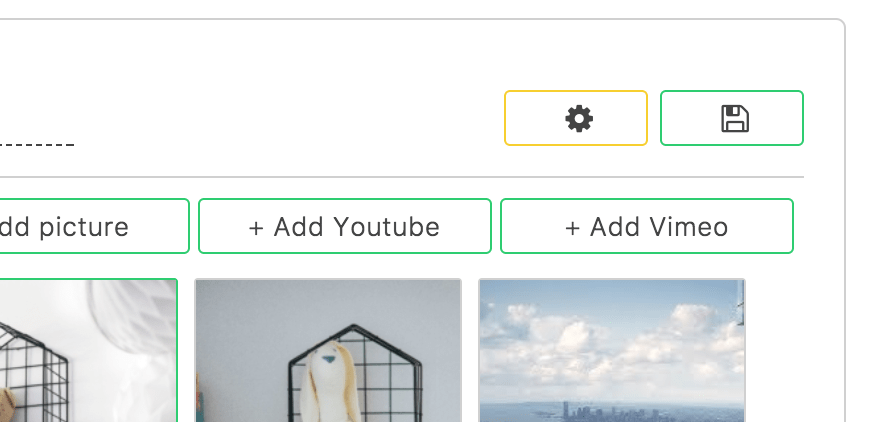
- It's time to save all your changes. Just press on "Save" button to keep all the modifications you've done since now:
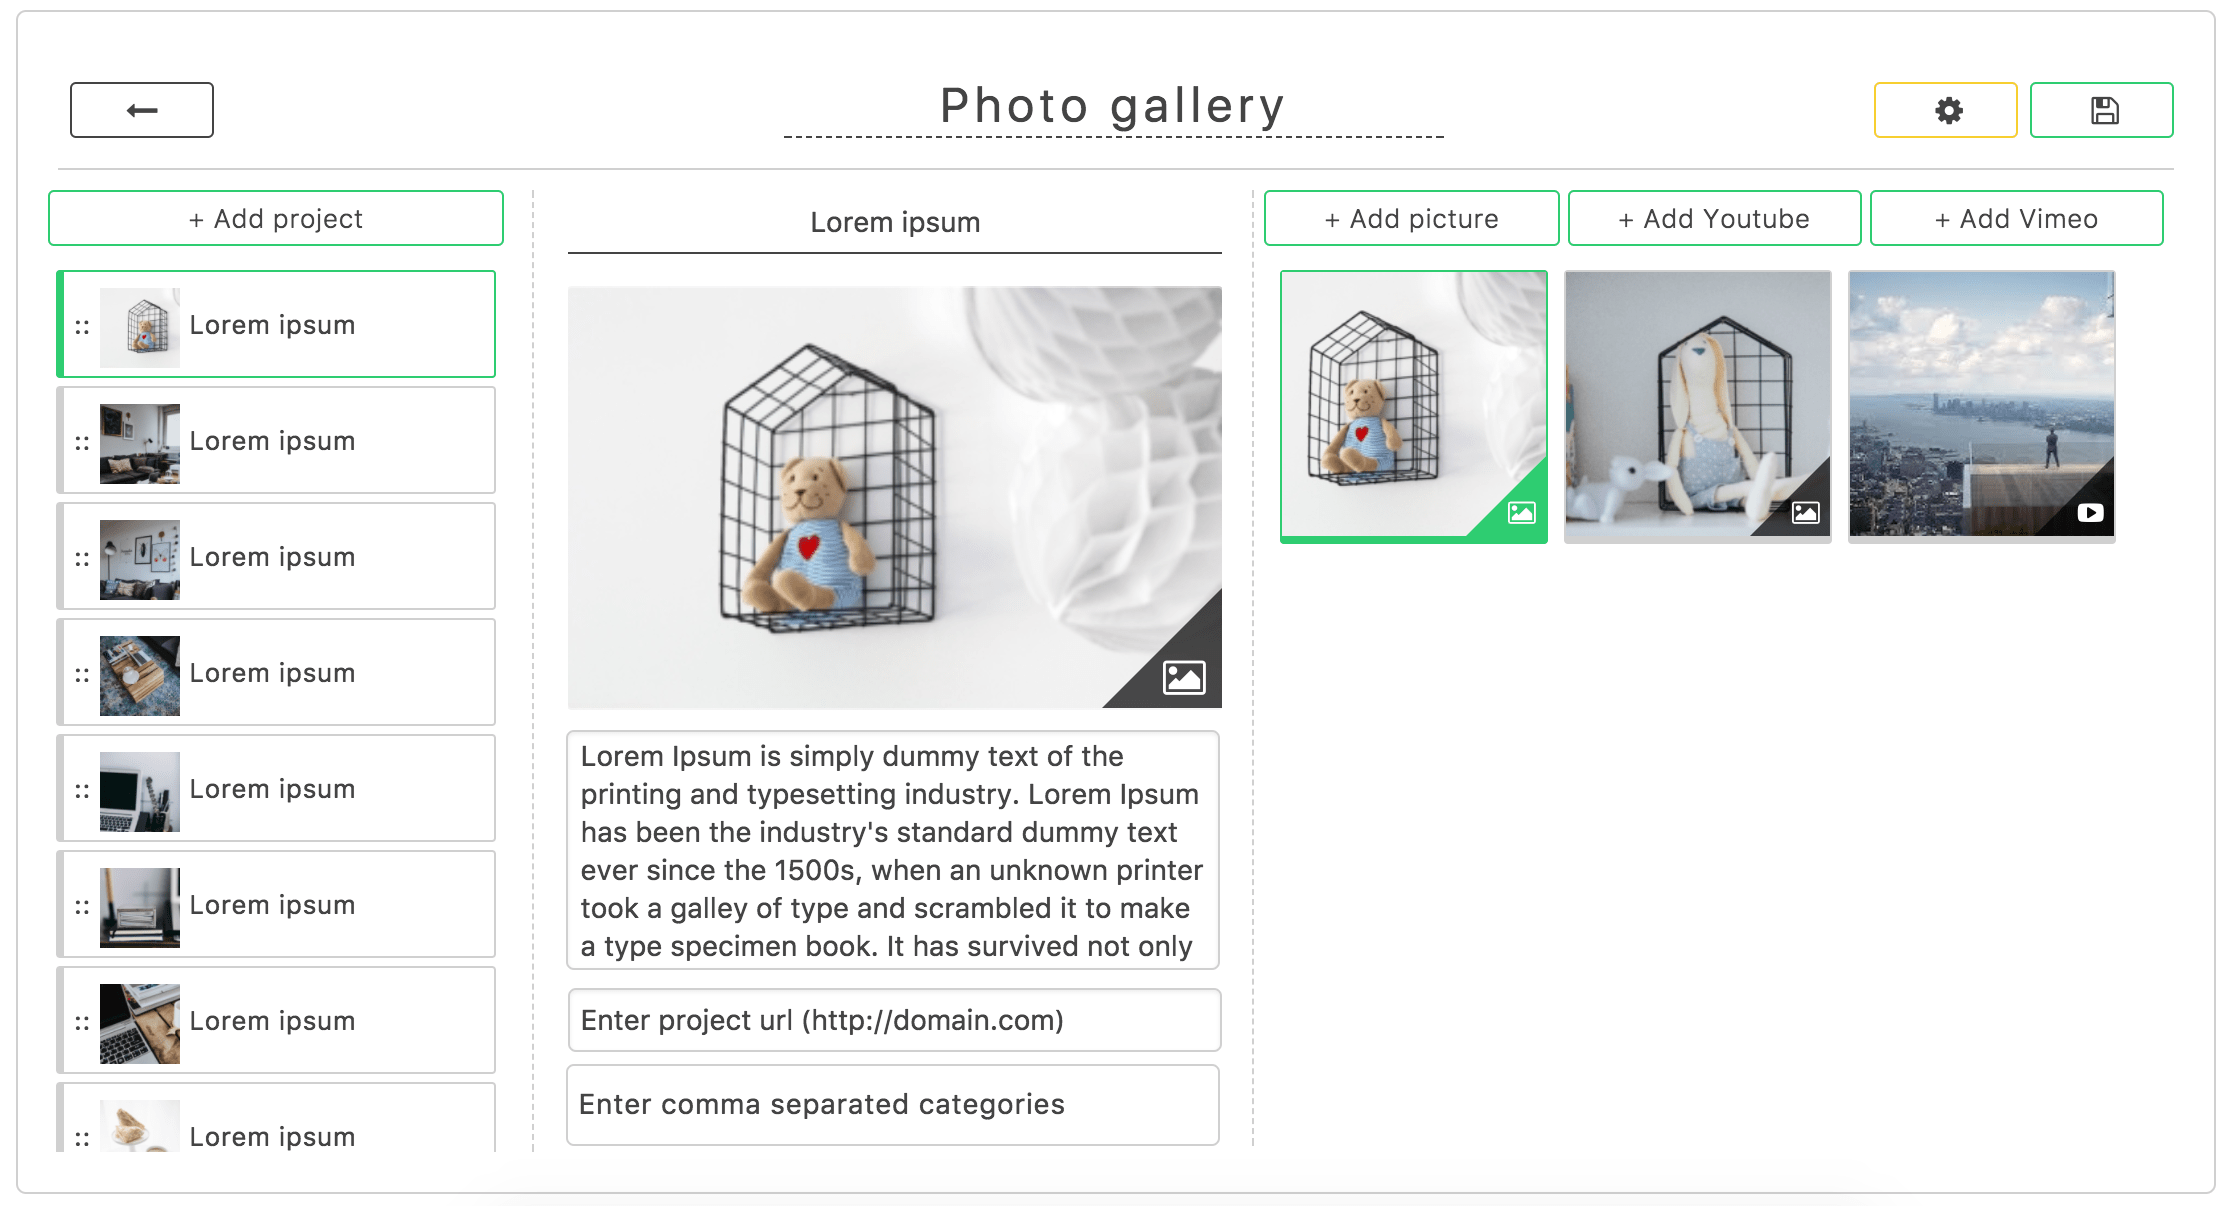
- Add more projects exactly the same way as you've already done. We've added some more project on our side:
You're done. You've successfully created a portfolio which has many projects and each project item has
multiple images, Youtube videos and Vimeo videos.
Note, that you can reorder your projects by dragging them up and down.
Create Gallery
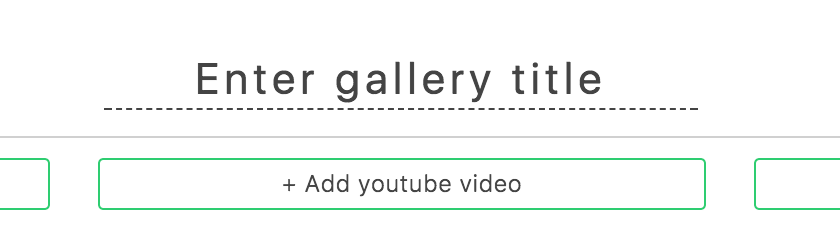
When you click on the "+ Add new Gallery" button, you will see an empty composer where you're gonna add all the gallery items:
- Entitle just added gallery:
-
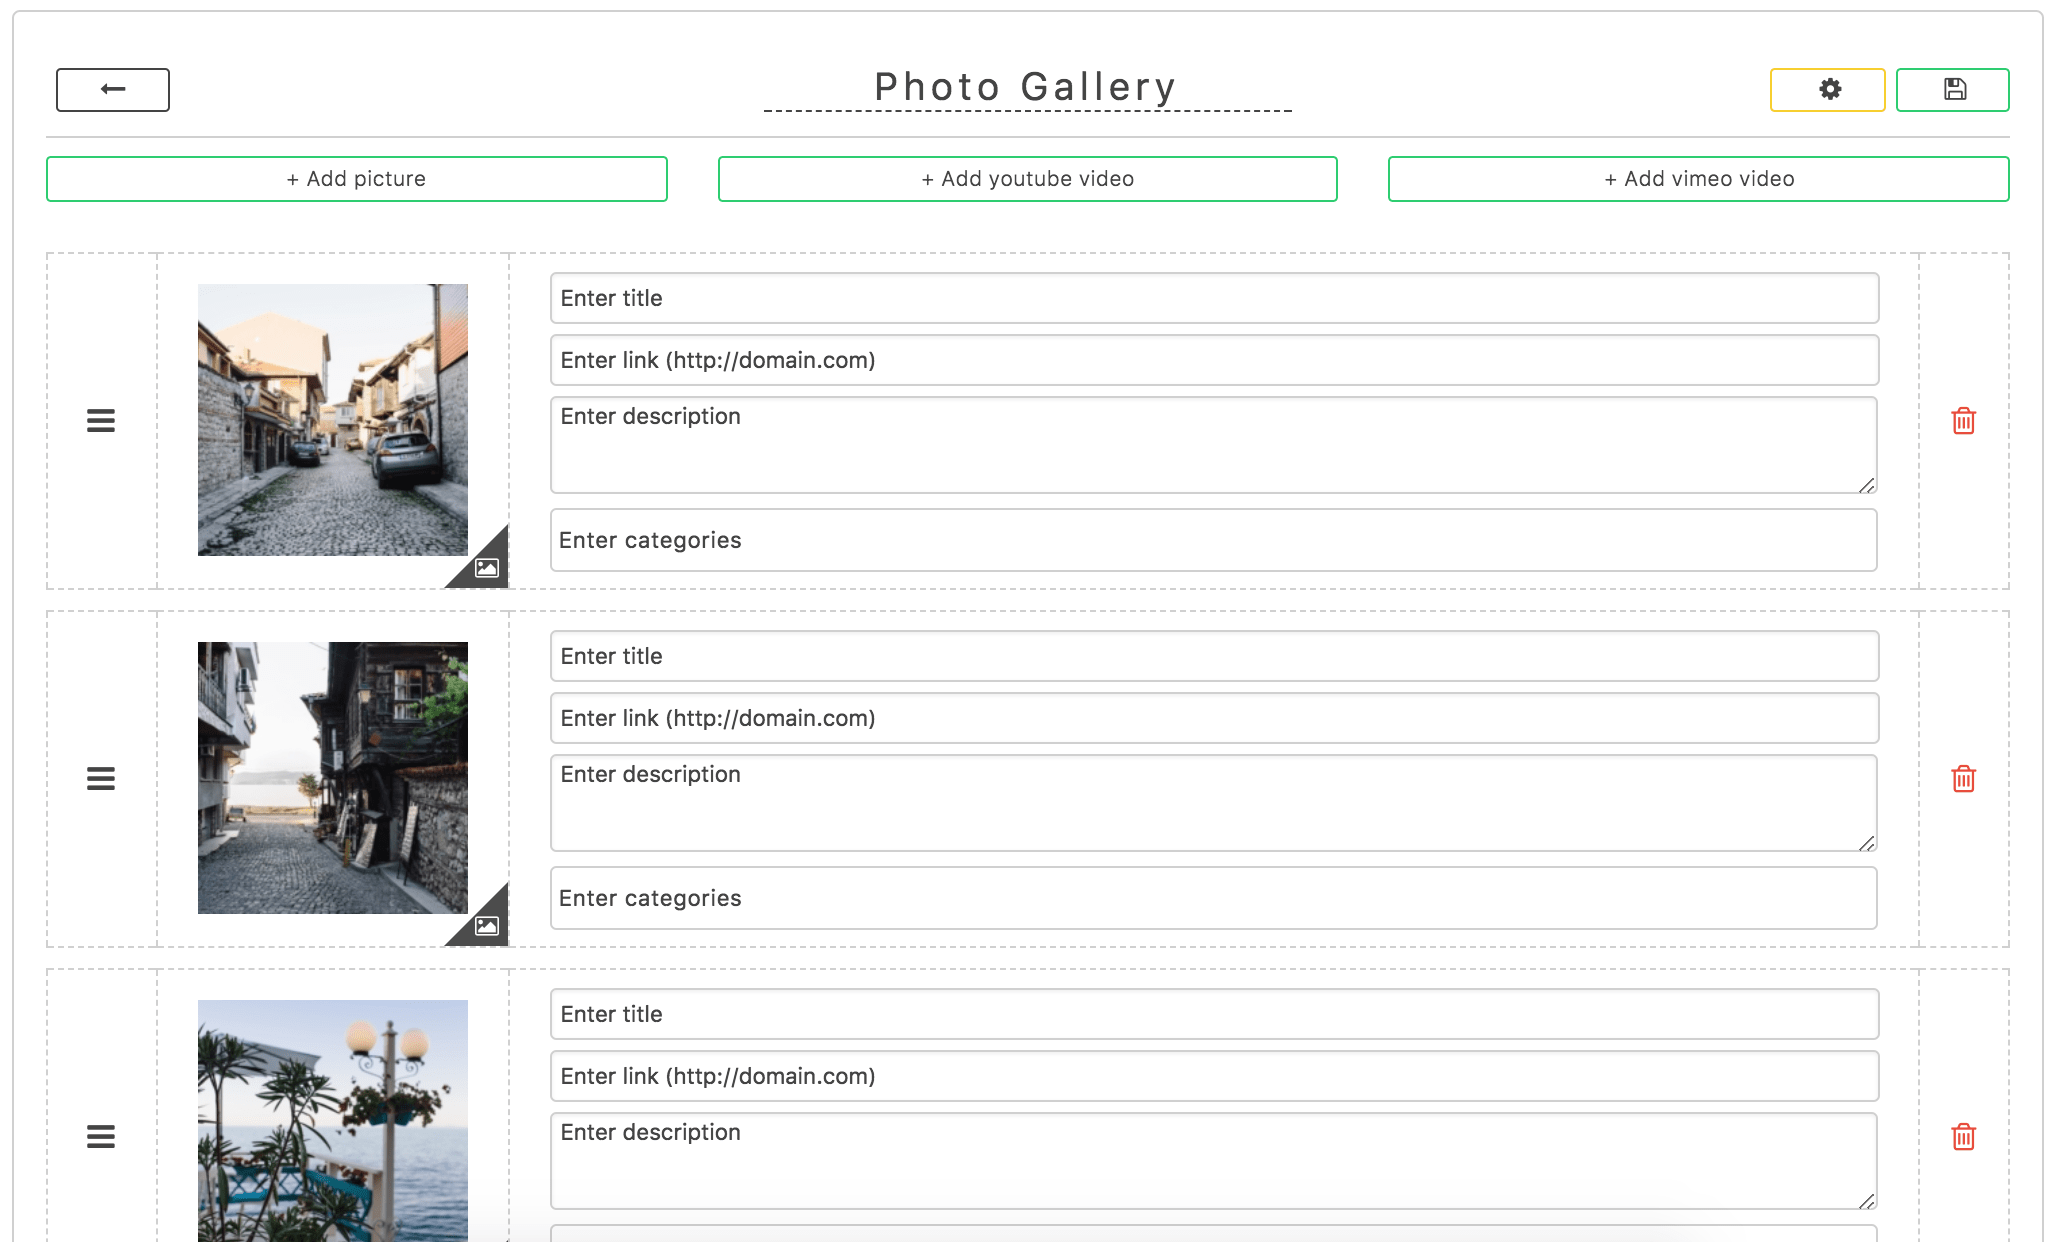
To add a new items to gallery press one of "+Add new ..." buttons (Go to "Add attachments" section to see how to add each of them).
In the case of pictures you can add bunch of them and it will automatically create separate projects for each of them.
-
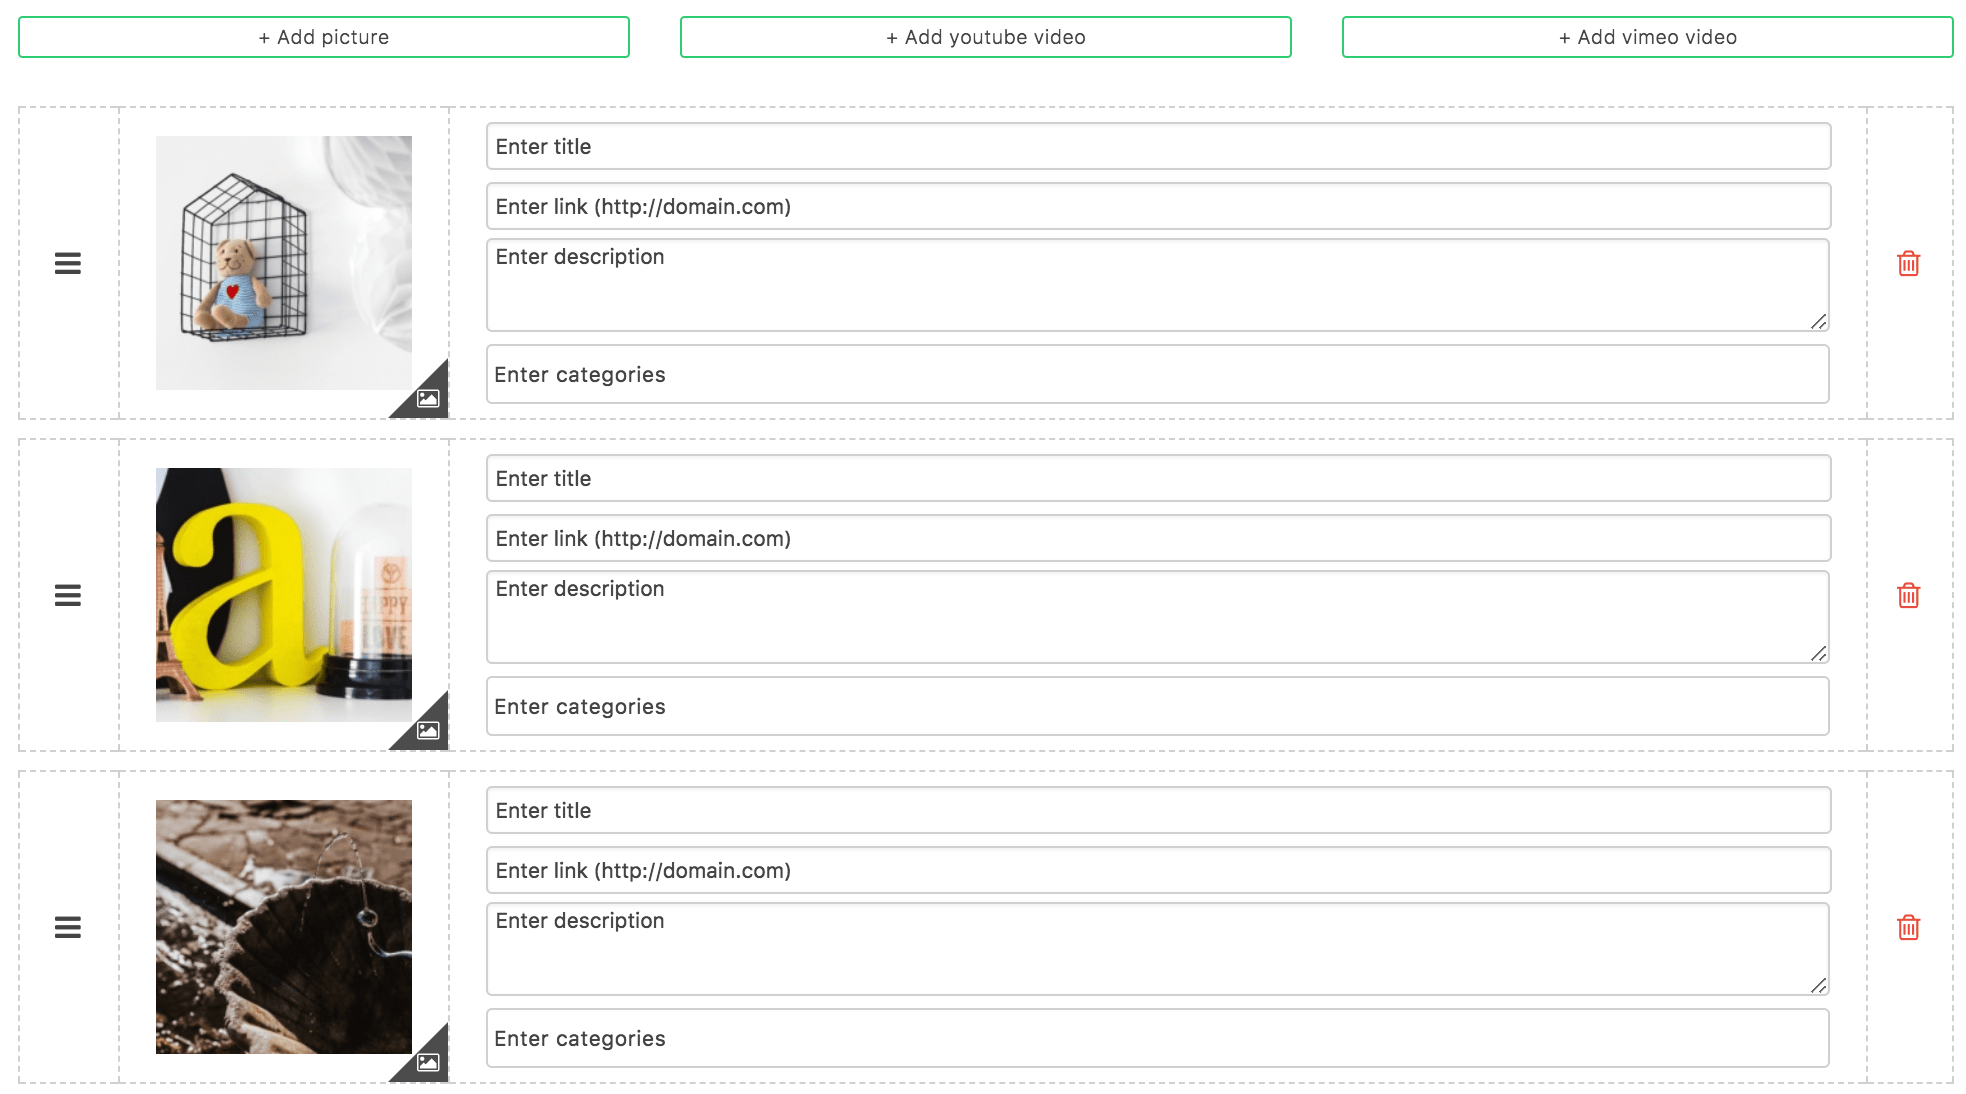
For each item you'll see an empty form view where you should fill the project's details.
Fill the information about project - you can enter a title, description and a url if it has. Also you can assign categories to the project (checkout the guide to categorize projects).
In the right-bottom corner of each item you can see an icon which shows whether that item is image, youtube video or a vimeo video.
- It's time to save all your changes. Just press on "Save" button to keep all the modifications you've done since now:
You're done. You've successfully created a gallery which has many images, Youtube videos and Vimeo videos. Note, that you can reorder your projects by dragging them up and down.
Adding attachments
There are 6 types of attachments you can add to your galleries/albums: pictures, videos, Youtube videos, Vimeo videos, iFrames and maps. Let's see how to add each of them.
- How to add pictures
When you click on "+Add picture" button, it opens WordPress's media uploader where you can select pictures: (you can select multiple pictures at once by holding the "Shift" key pressed)
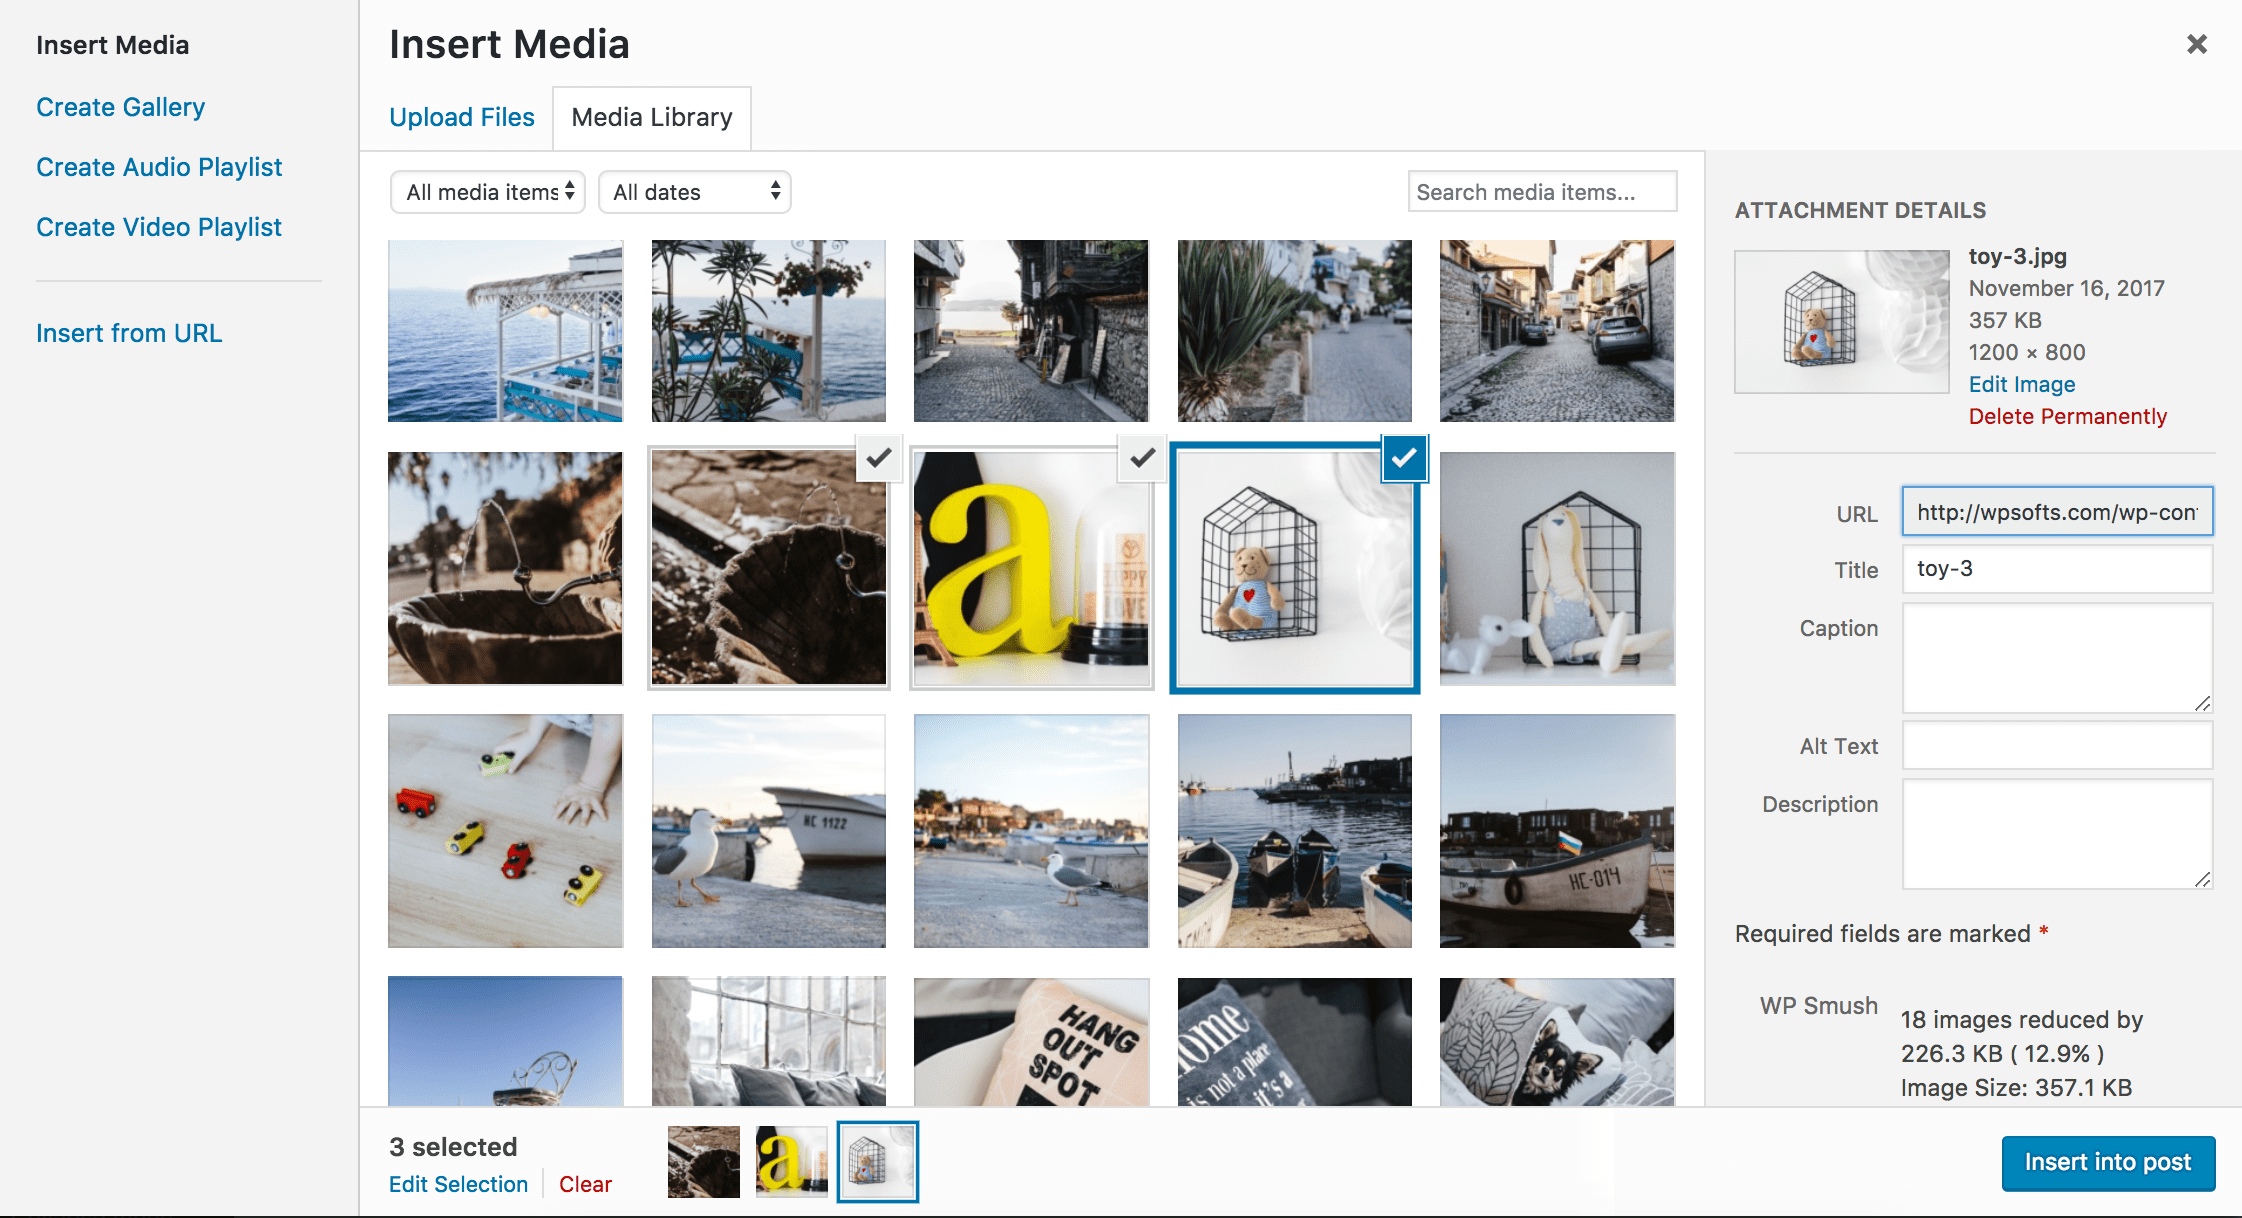
After selecting pictures just press "Insert into post" button in media uploader and you'll get the pictures added to your project.
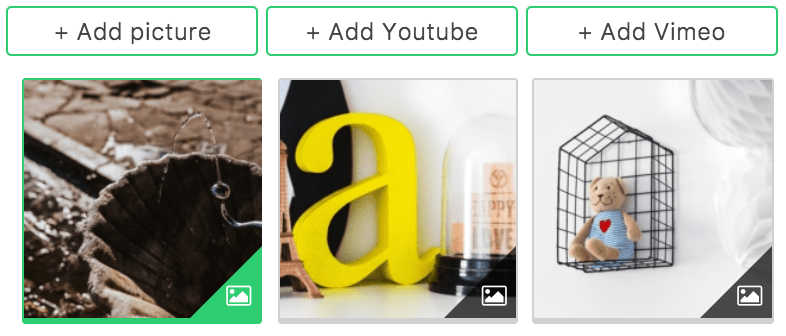
In the case of album you'll get pictures attached to your project:
And in the case of gallery you'll get newly created projects from each of selected pictures:
In the right-bottom corner of each added item there is an icon showing the attachment's type - Picture.
- How to add local videos from your server
When you click on "+Add Video" button, it opens a popup where you should fill your video data.
Click "Browse" button to choose the video from your media gallery. When you click it, it opens WordPress's media uploader where you can select the video:
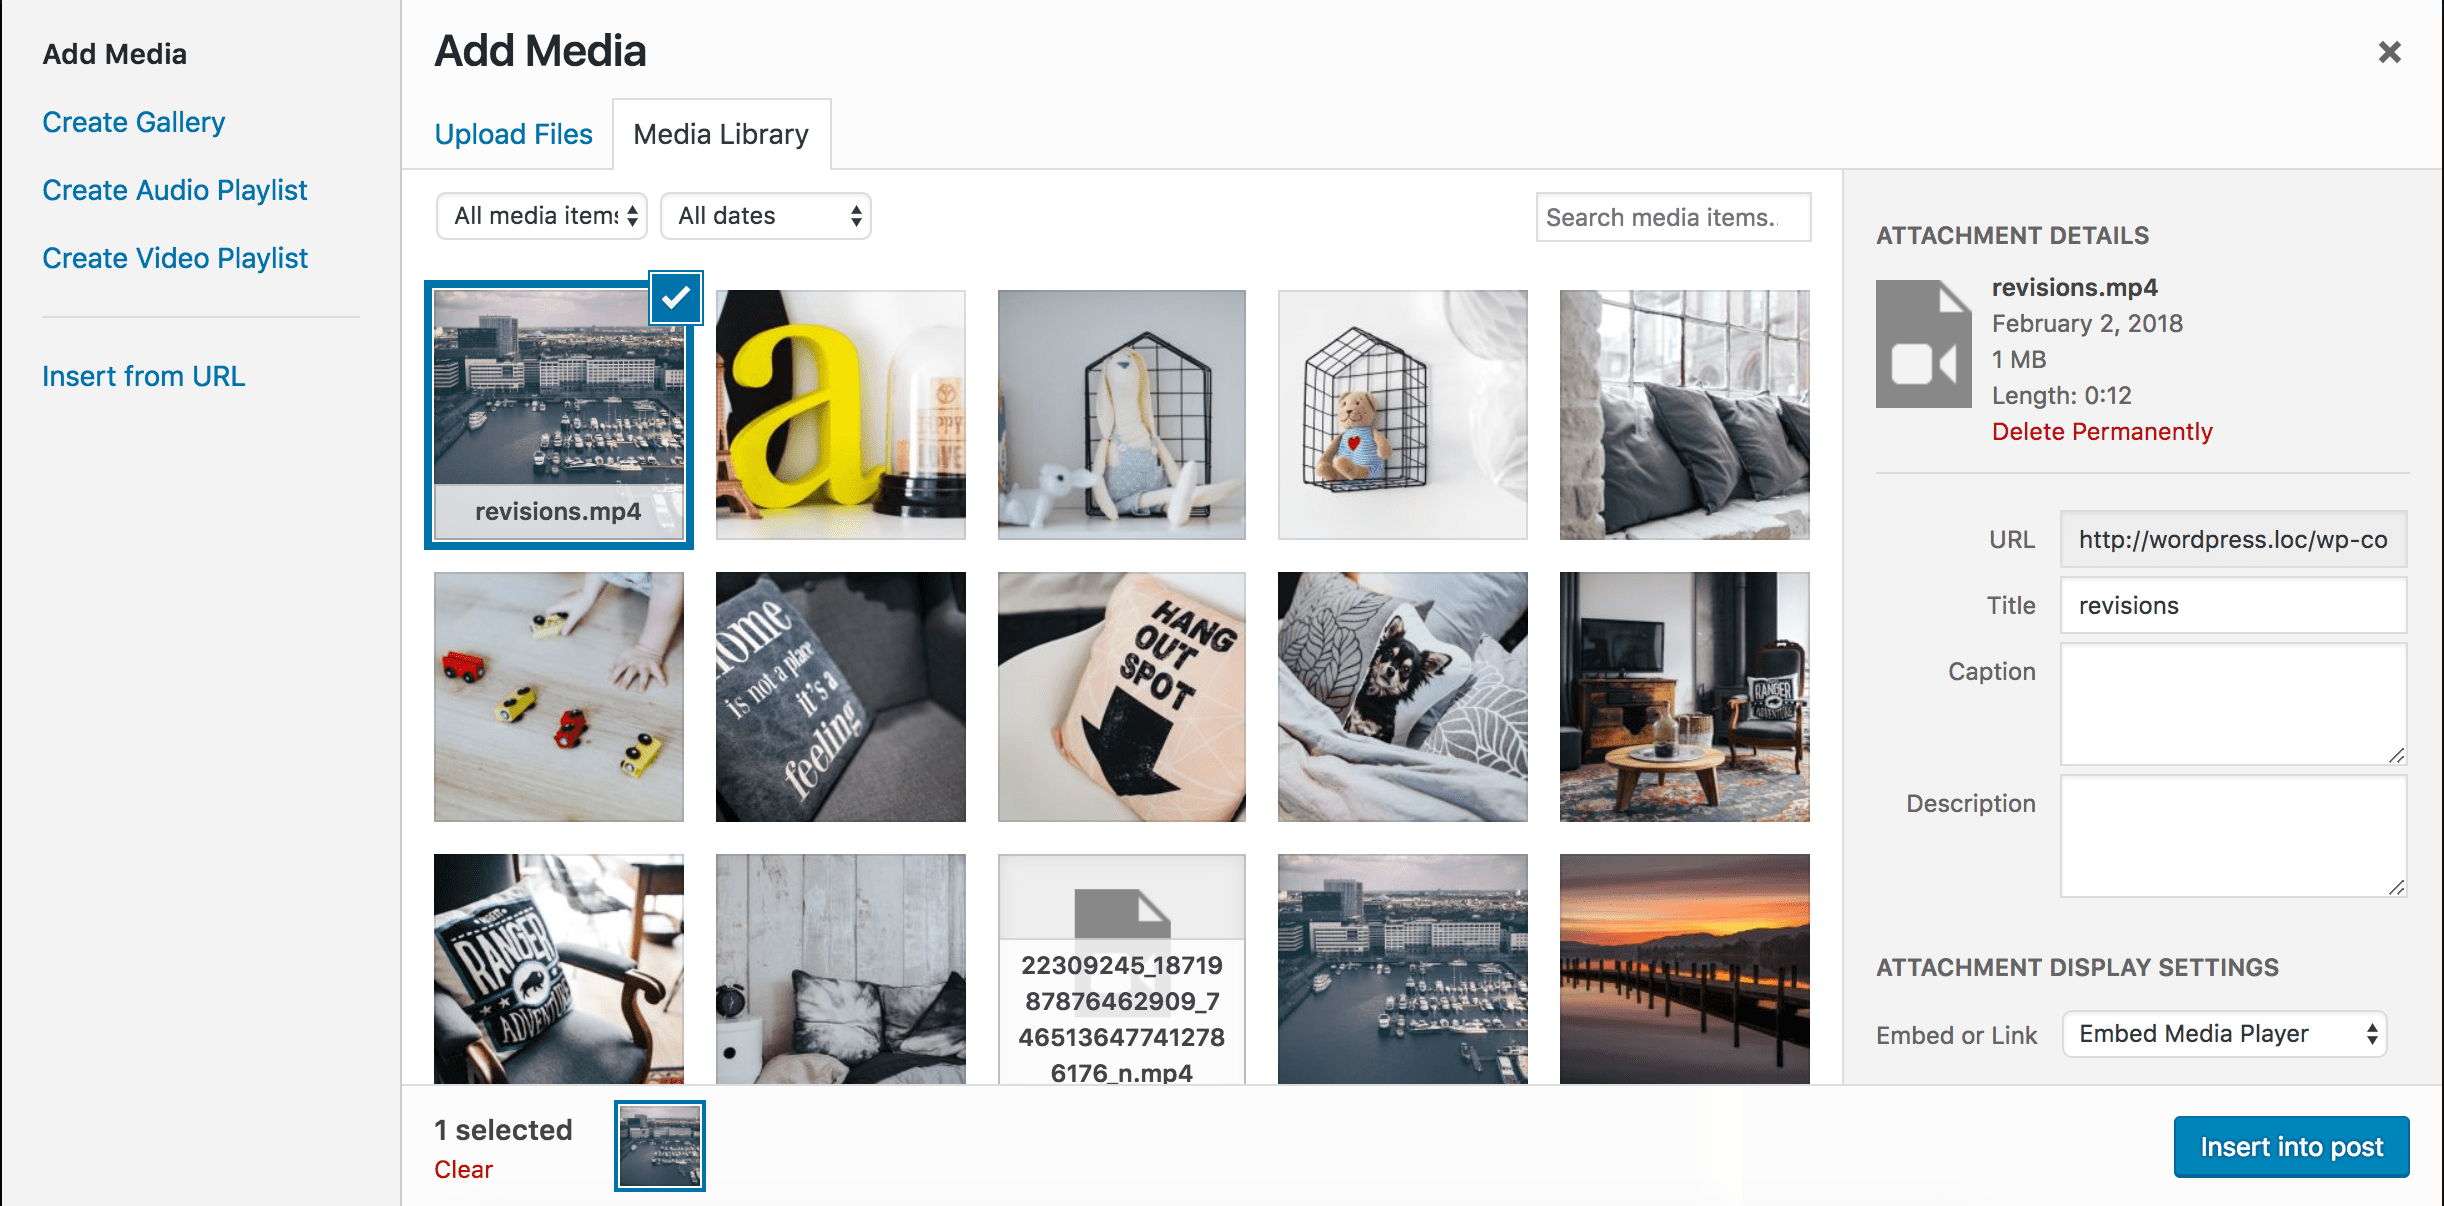
After selecting a video just press "Insert into post" button in media uploader. After that a default thumbnail of video will be shown.
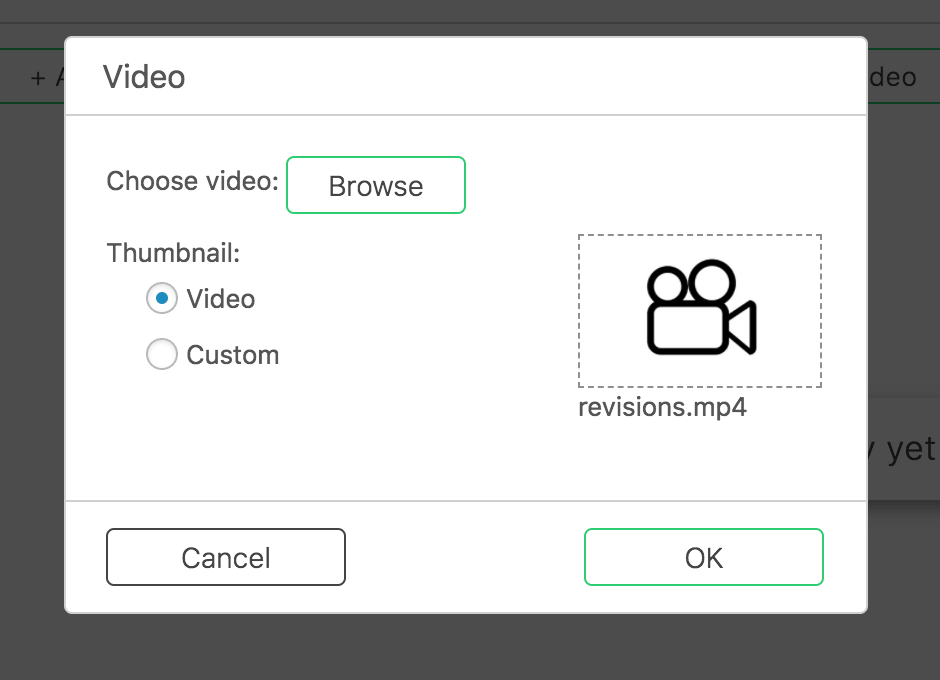
The "Thumbnail" option shows whether to use the default thumbnail or use a custom image. When you change it to "Custom" it opens WordPress's media uploader where you can choose the image you want to use as your video's thumbnail:
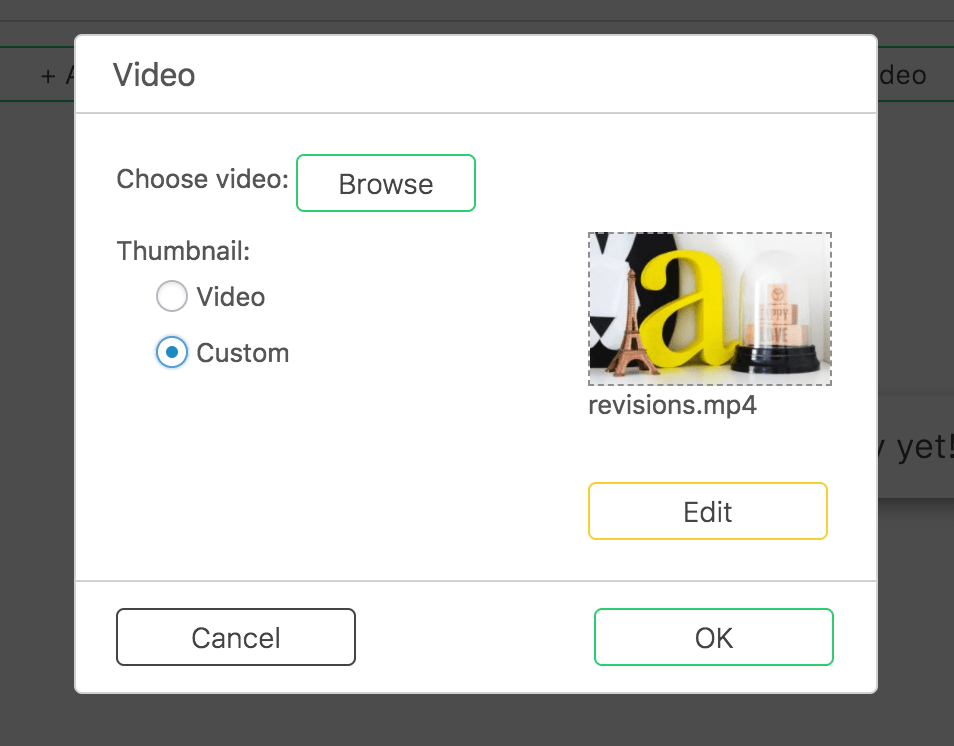
Any time you can change the thumbnail type (default or custom), and you can change the custom image of course (via "Edit" button under custom thumbnail).
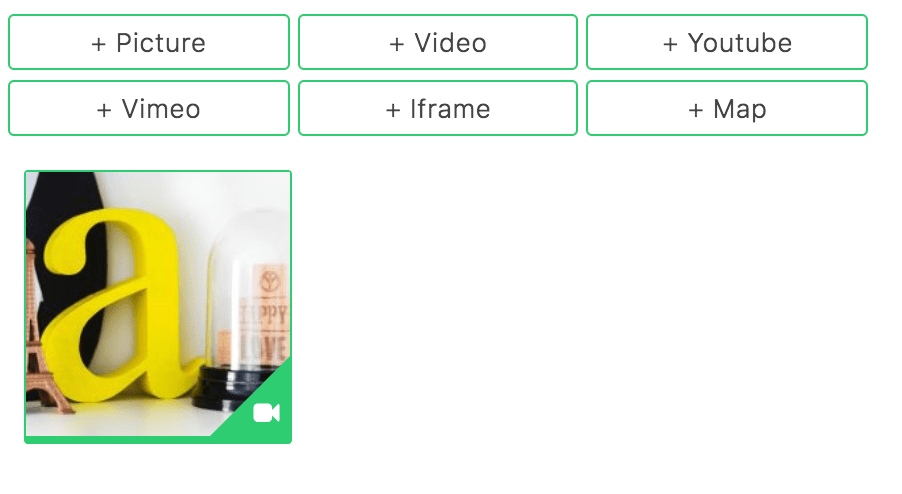
After you filled all the data, just press the "OK" button and you'll get your video added to your project.
In the case of album you'll get the video attached to your project:
And in the case of gallery you'll get a newly created project from the selected video:

In the right-bottom corner of each added item there is an icon showing the attachment's type - Video.
- How to add Youtube videos
When you click on "+Add Youtube Video" button, it opens a popup where you should fill your Youtube video data.
In the "Youtube url" field put your Youtube video's url or id. When you put it, the thumbnail of your video will be shown.
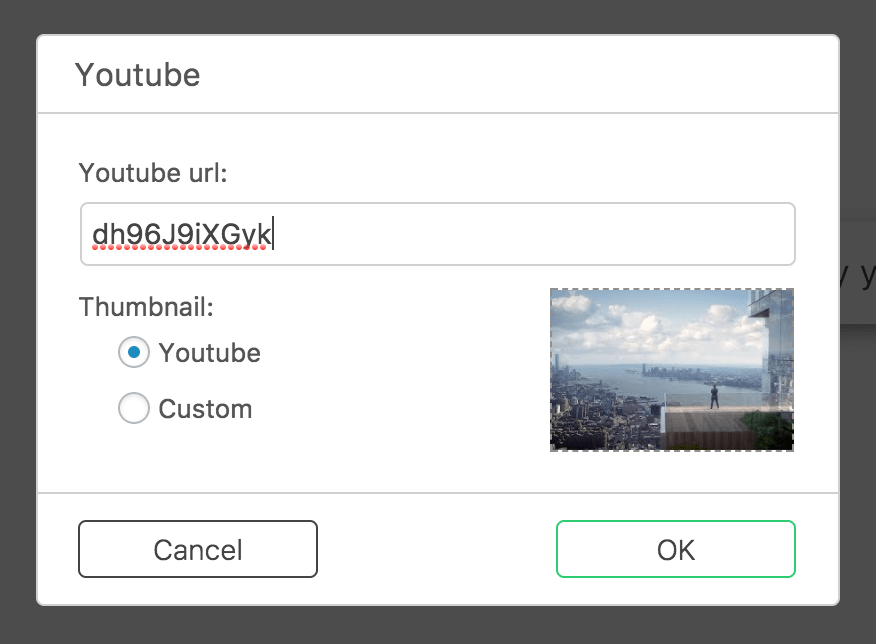
The "Thumbnail" option shows whether to use the thumbnail taken from Youtube or use a custom image. When you change it to "Custom" it opens WordPress's media uploader where you can choose the image you want to use as your video's thumbnail:
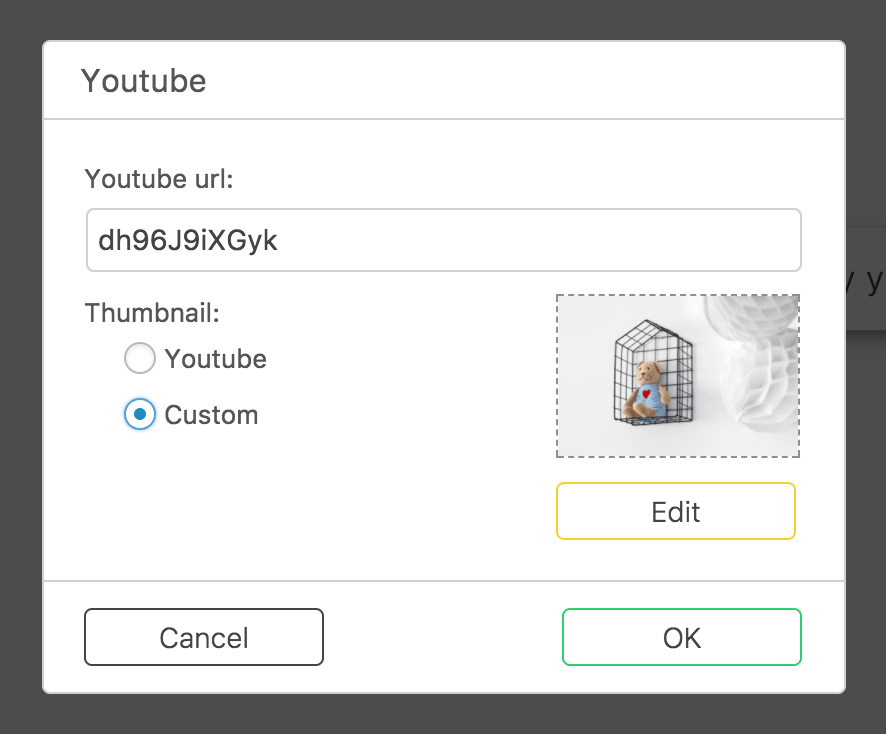
Any time you can change the thumbnail type (youtube or custom), and you can change the custom image of course (via "Edit" button under custom thumbnail).
After you filled all the data, just press the "OK" button and you'll get your video added to your project.
In the case of album you'll get your Youtube video attached to your project:

And in the case of gallery you'll get a newly created project from your Youtube video:
In the right-bottom corner of added item there is an icon showing the attachment's type - Youtube video.
- How to add Vimeo videos
When you click on "+Add Vimeo Video" button, it opens a popup where you should fill your Vimeo video data.
In the "Vimeo url" field put your Vimeo video's url or id. When you put it, the thumbnail of your video will be shown.
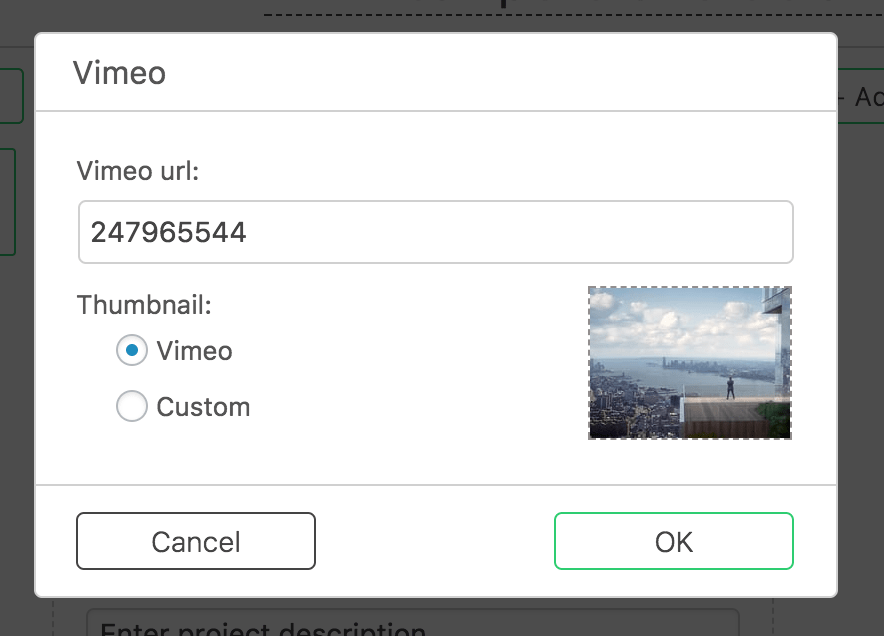
The "Thumbnail" option shows whether to use the thumbnail taken from Vimeo or use a custom image. When you change it to "Custom" it opens WordPress's media uploader where you can choose the image you want to use as your video's thumbnail:

Any time you can change the thumbnail type (vimeo or custom), and you can change the custom image of course (via "Edit" button under custom thumbnail).
After you filled all the data, just press the "OK" button and you'll get your video added to your project.
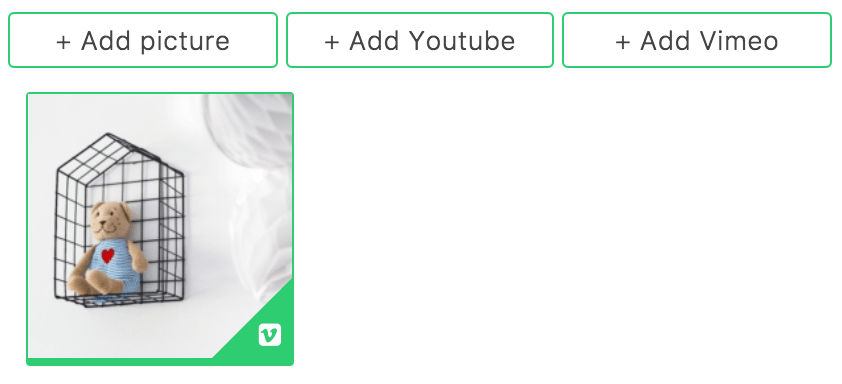
In the case of album you'll get your Vimeo video attached to your project:
And in the case of gallery you'll get a newly created project from your Vimeo video:
In the right-bottom corner of added item there is an icon showing the attachment's type - Vimeo video.
- How to add iFrames
When you click on "+Add iFrame" button, it opens a popup where you should fill your iFrame data.
In the "Iframe source url" field put the url you want to embed. When you put it, the default thumbnail of iFrame will be shown.
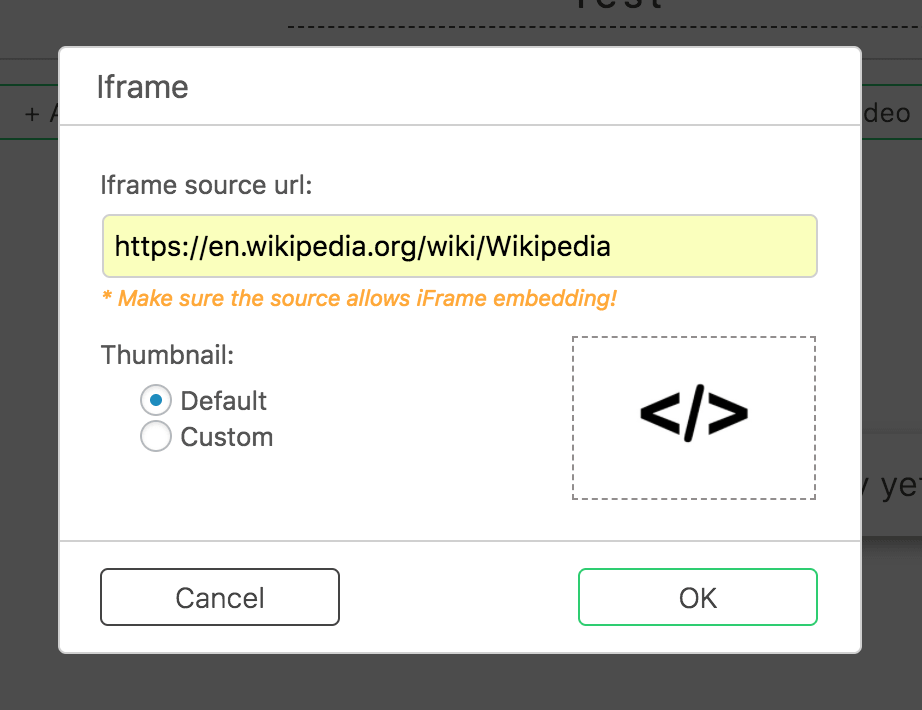
Note, that the url you are trying to put here should allow embedding itself in iFrames, otherwise it can't be displayed on your site. It is configured from the website, which url you're putting here.
The "Thumbnail" option shows whether to use the default thumbnail for iFrames or use a custom image. When you change it to "Custom" it opens WordPress's media uploader where you can choose the image you want to use as your iFrame's thumbnail:
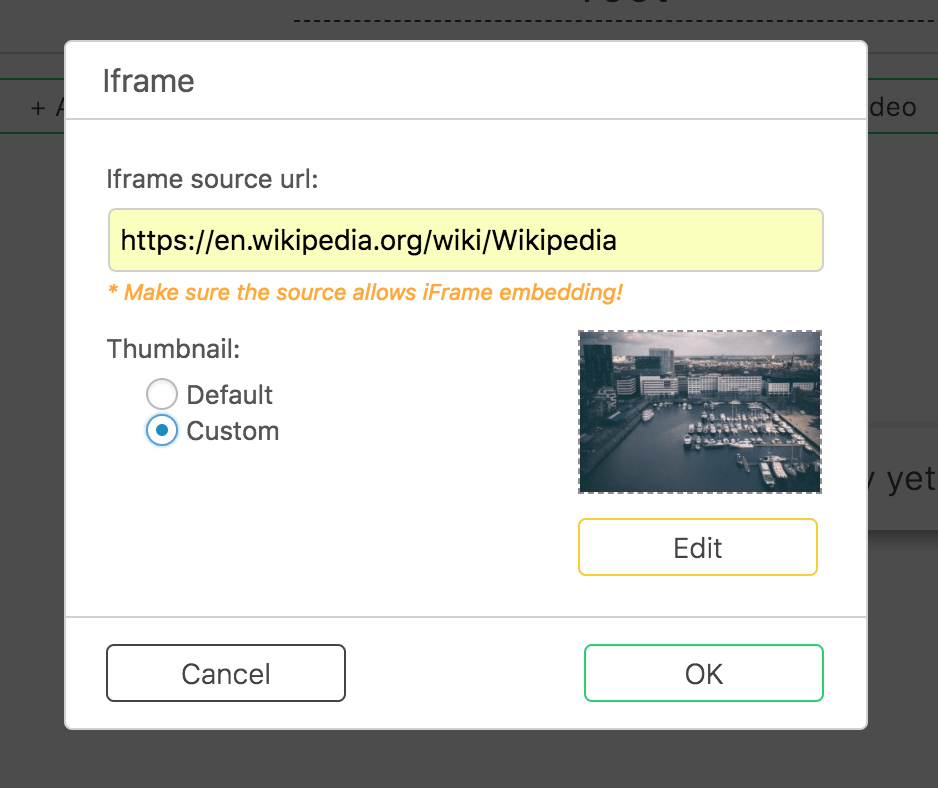
Any time you can change the thumbnail type (default or custom), and you can change the custom image of course (via "Edit" button under custom thumbnail).
After you filled all the data, just press the "OK" button and you'll get your iFrame added to your project.
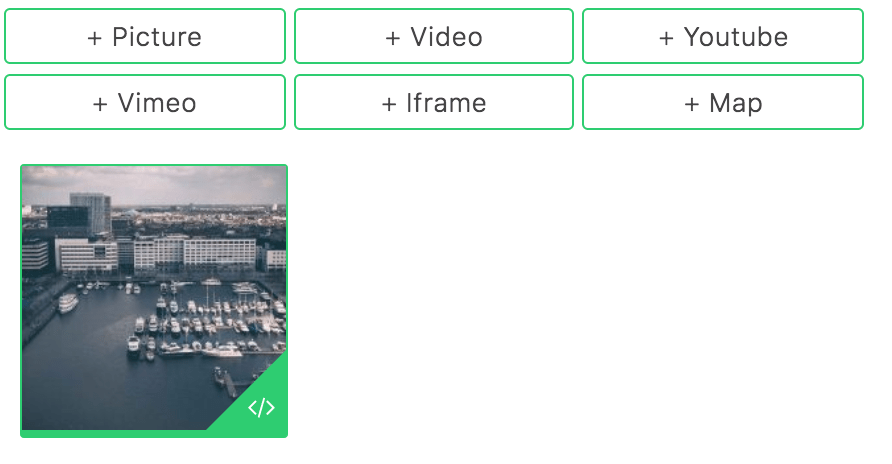
In the case of album you'll get your iFrame attached to your project:
And in the case of gallery you'll get a newly created project from your just added iFrame:
In the right-bottom corner of added item there is an icon showing the attachment's type - iFrame.
- How to add Maps
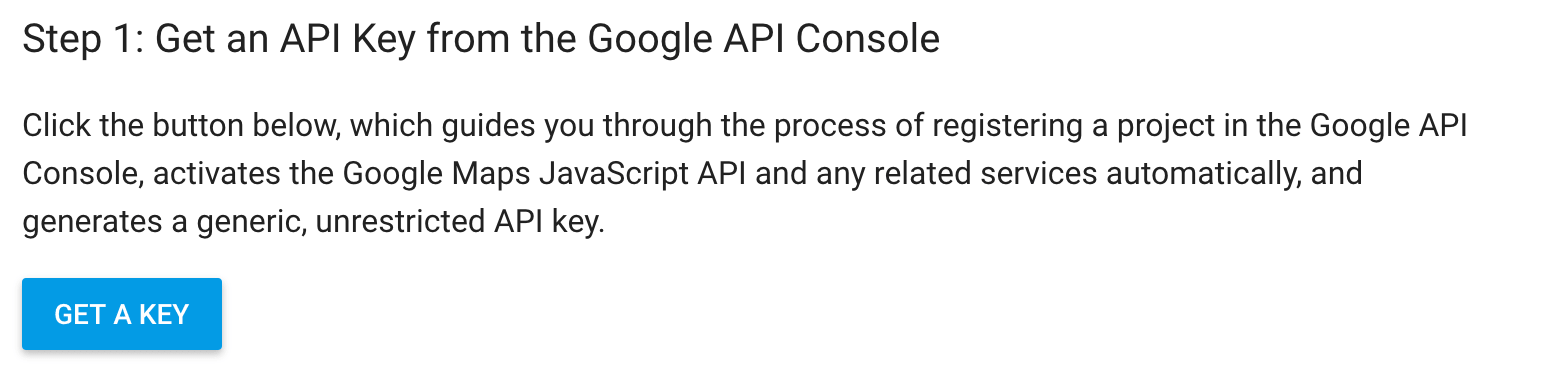
We use Google map to embed maps, so we need an API_KEY for that. First time when you click on "+Add map" button, it asks you to go to your settings and add the Google map API_KEY. To get an API_KEY, just follow this link and hit "GET A KEY" button. Follow the steps there and copy the KEY it gives you.
When you got a key, just go to your grid's settings and put that key in the "Google map API_KEY" field, under the "Advanced" section:

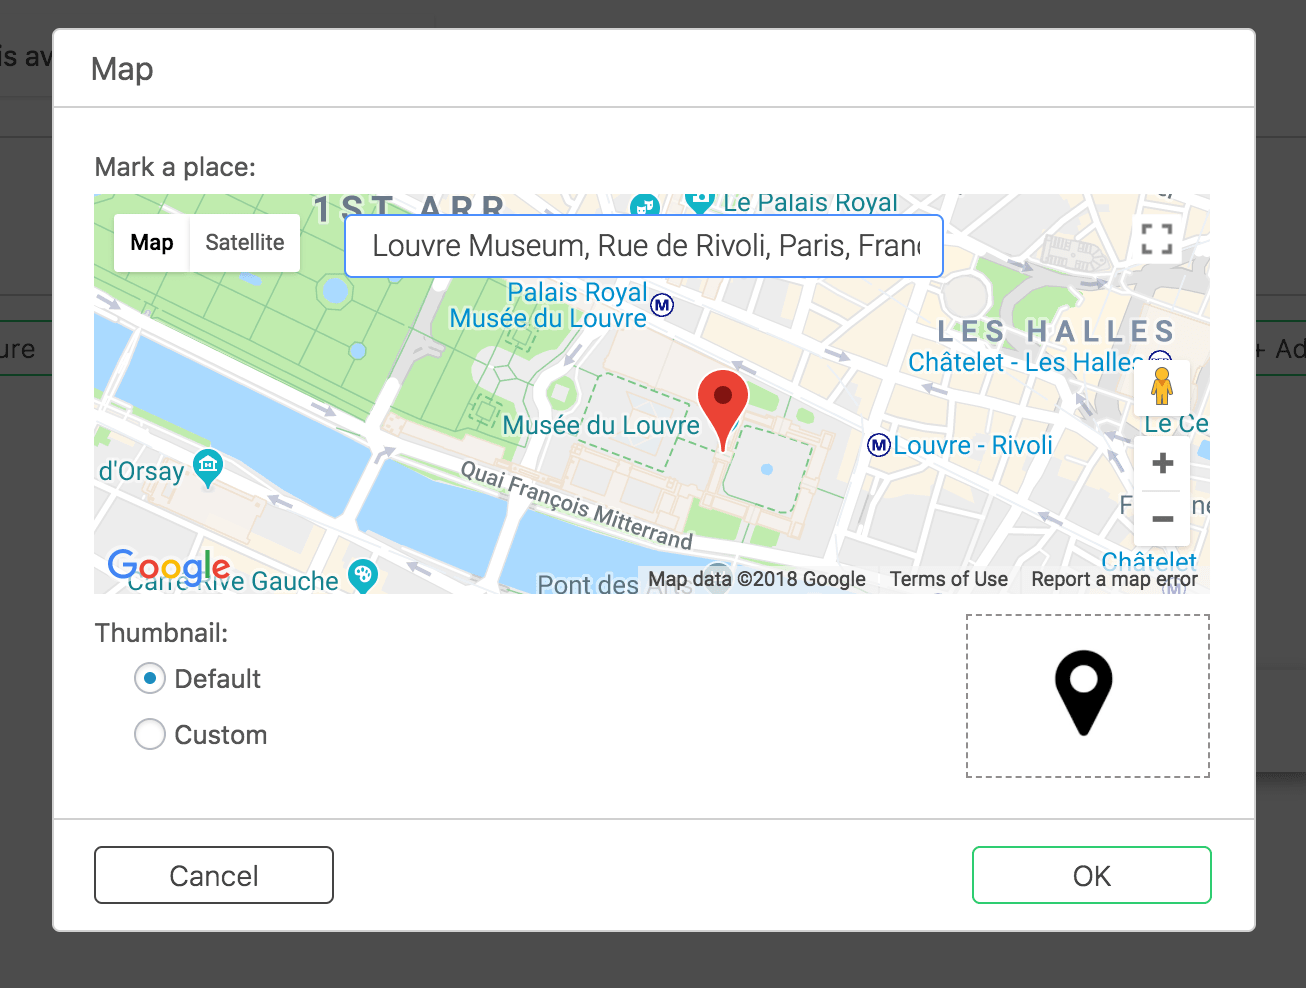
Now, after saving the settings, when you click the "+Add map" button, it opens a popup where you should fill your map's data:
Now you can mark any place/address you want. You can do it just by clicking somewhere on the map or by typing it's name in "Search box" and choosing that place. Then it will add a pin in the place you've just marked and put a default thumbnail for map:
The "Thumbnail" option shows whether to use the default thumbnail for maps or use a custom image. When you change it to "Custom" it opens WordPress's media uploader where you can choose the image you want to use as your map's thumbnail:
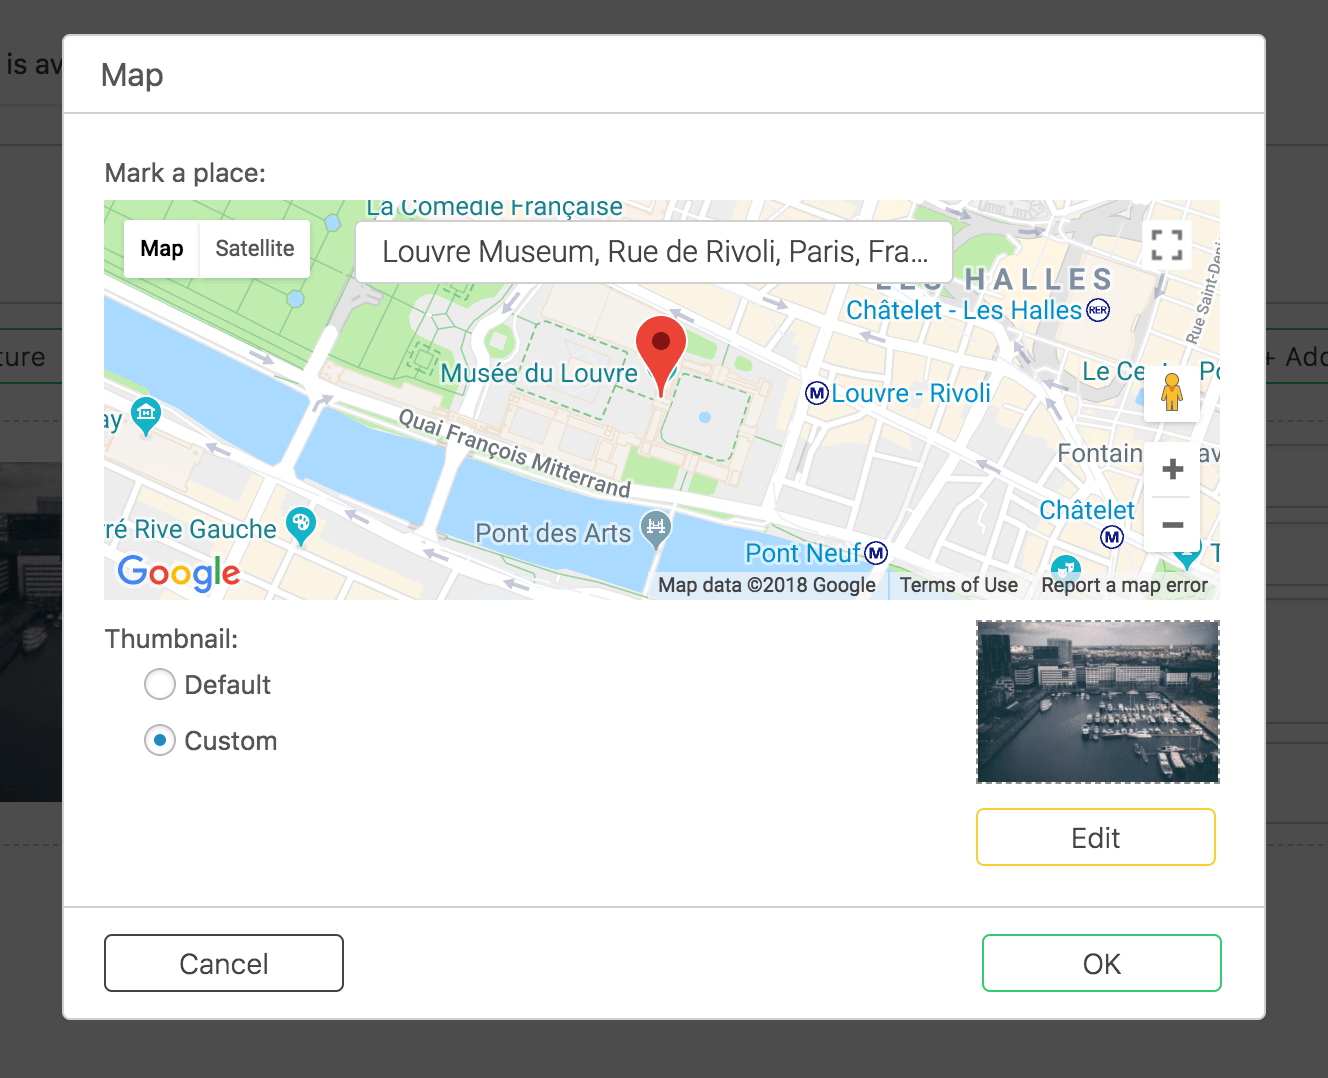
Any time you can change the thumbnail type (default or custom), and you can change the custom image of course (via "Edit" button under custom thumbnail).
After you filled all the data, just press the "OK" button and you'll get your map added to your project.
In the case of album you'll get your map attached to your project:
And in the case of gallery you'll get a newly created project from your just added map:
In the right-bottom corner of added item there is an icon showing the attachment's type - Map.
Showcase Grid
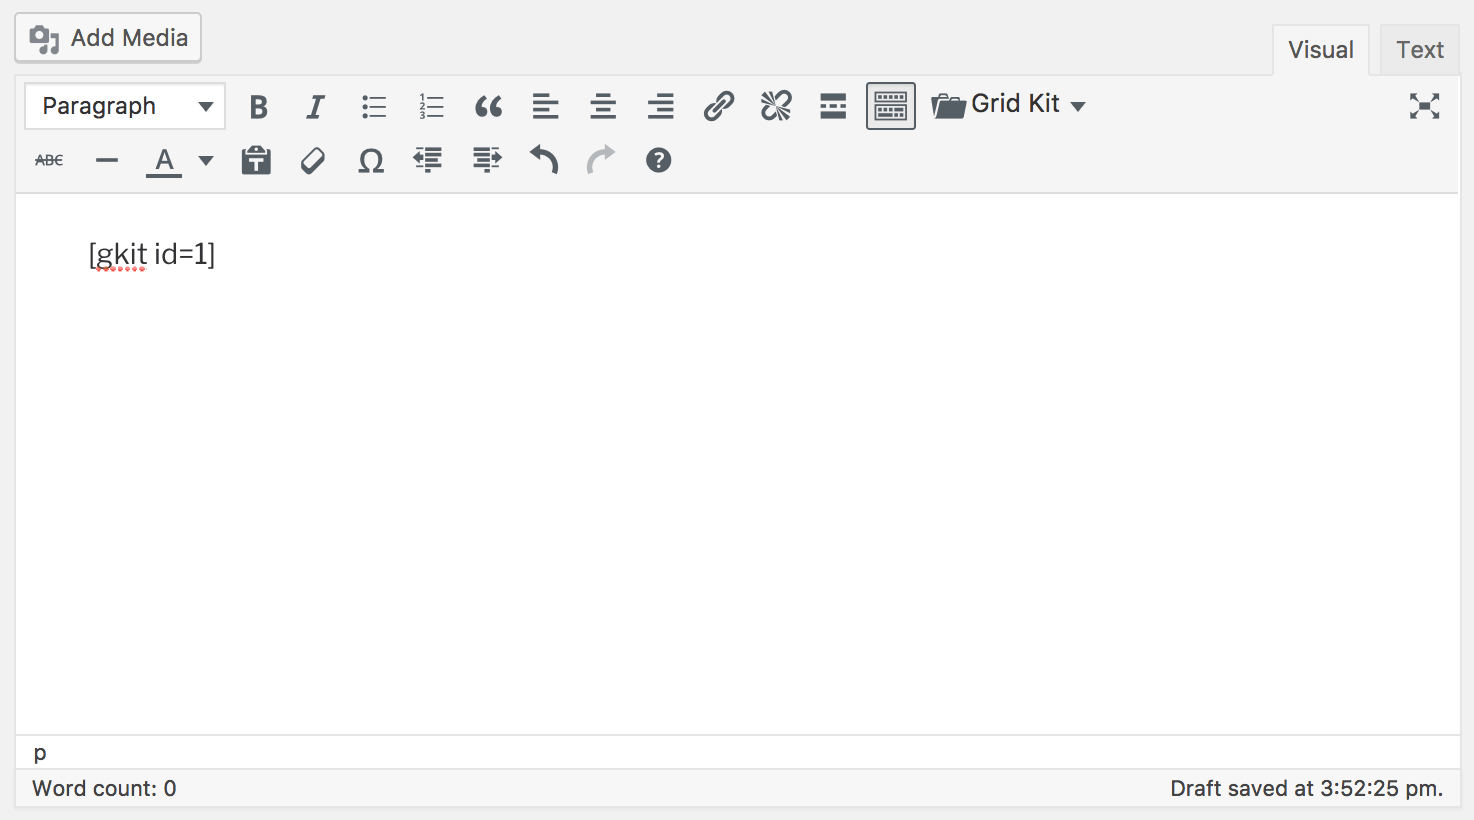
To showcase any grid, simply you should add the grid related shortcode into the page or post where you want to showcase it. You have 2 different options to achieve the goal. Either you can copy the generated shortcode from the dashboard screen where are listed all your grids or just simply use our TinyMCE custom button.
Use copy/past approach
- Select "Grid Kit" menu item from sidebar to open the dashboard:
- Edit the page/post where you want to showcase the grid. Put the shorcode into the TinyMCE editor and update your page/post (checkout the "Shortcode" column in the grid):
Use TinyMCE button's approach
- Edit the page/post where you want to showcase the grid. Find the "Grid Kit" TinyMCE button on the editor's toolbar. From the dropdown menu select the desired grid and update your page/post:

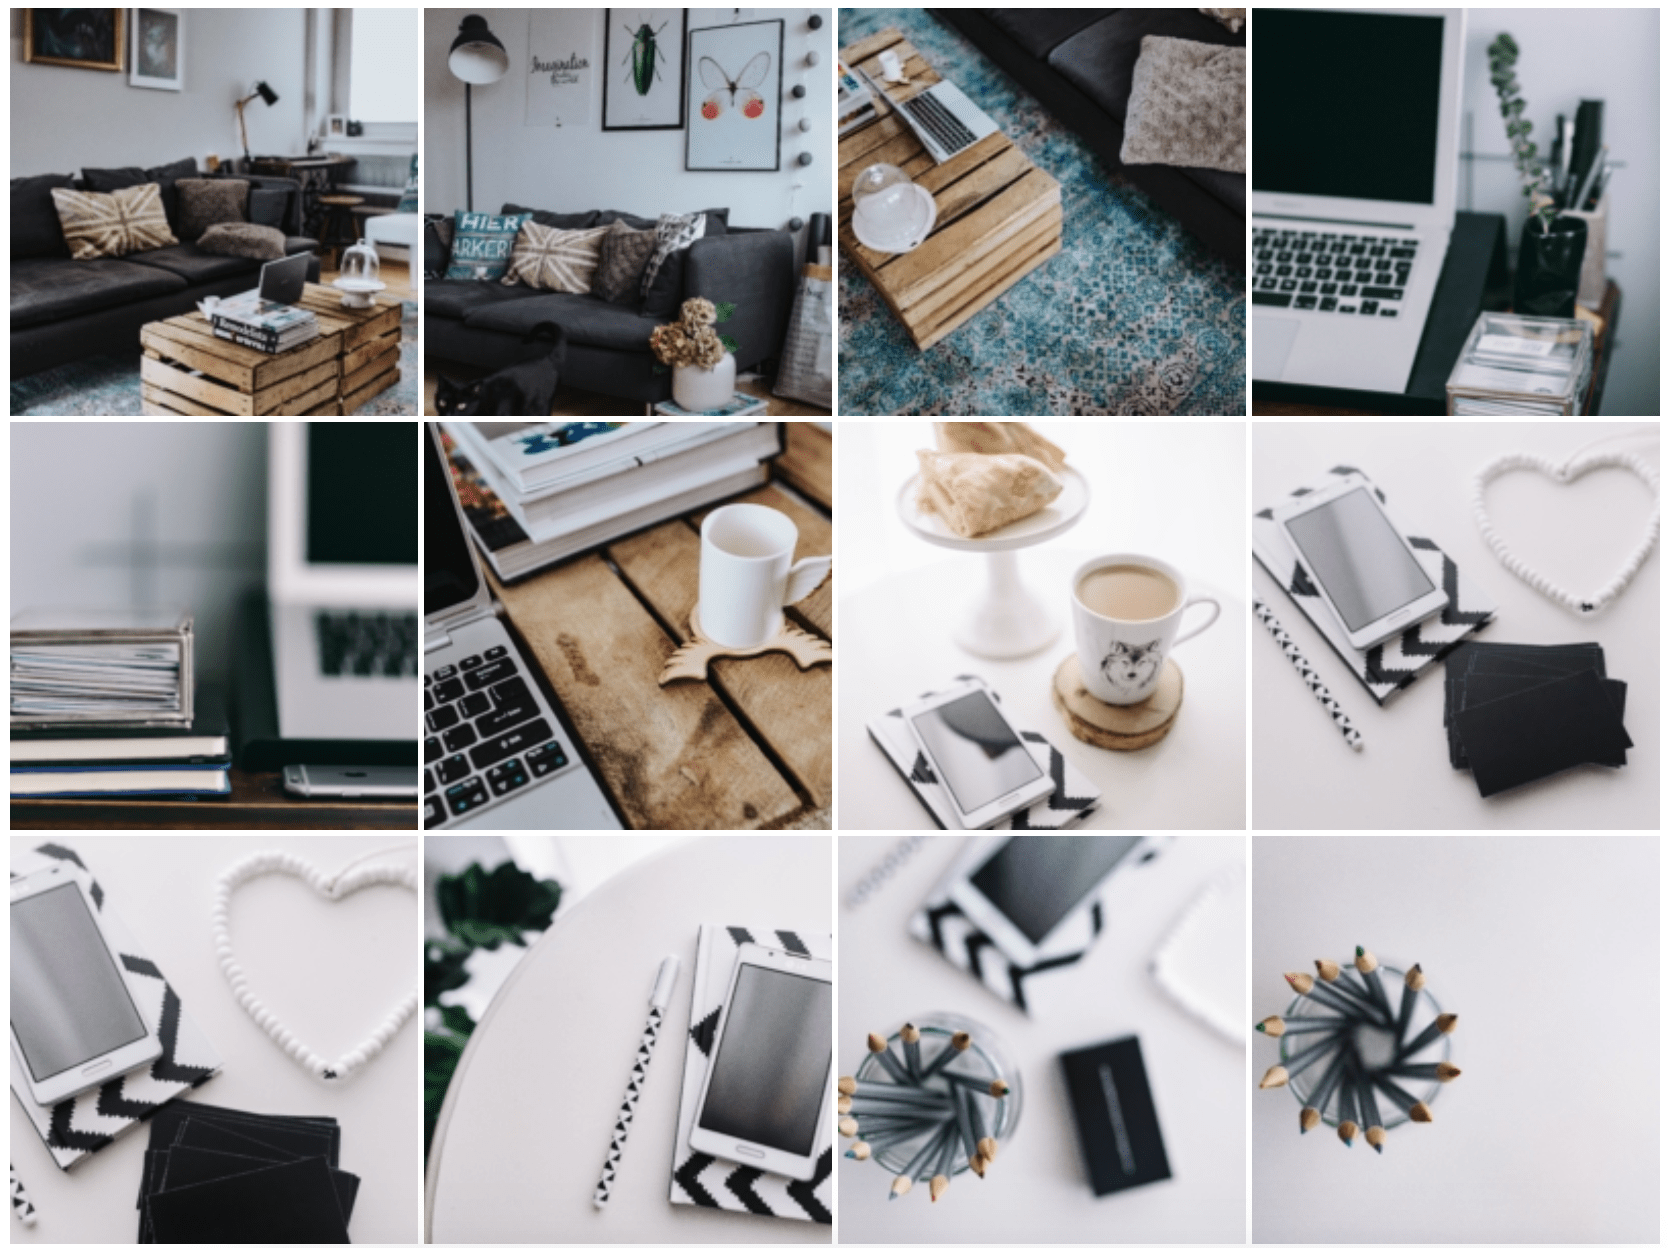
This is the landing page's look where we've put shorcode on ourside.
Categorize Projects
- Open the grid which you want to modify. Both in album and gallery cases, for each project you'll see a field for filling categories:

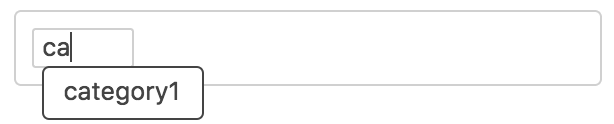
- Select the project to assign a category. Enter comma separated categories the project relates to:
Note: If you enter a category once, you'll see it as a hint next time:
- This is the final look of category filed we got on our side:

Asign categories for each project exactly the same way as we did already.
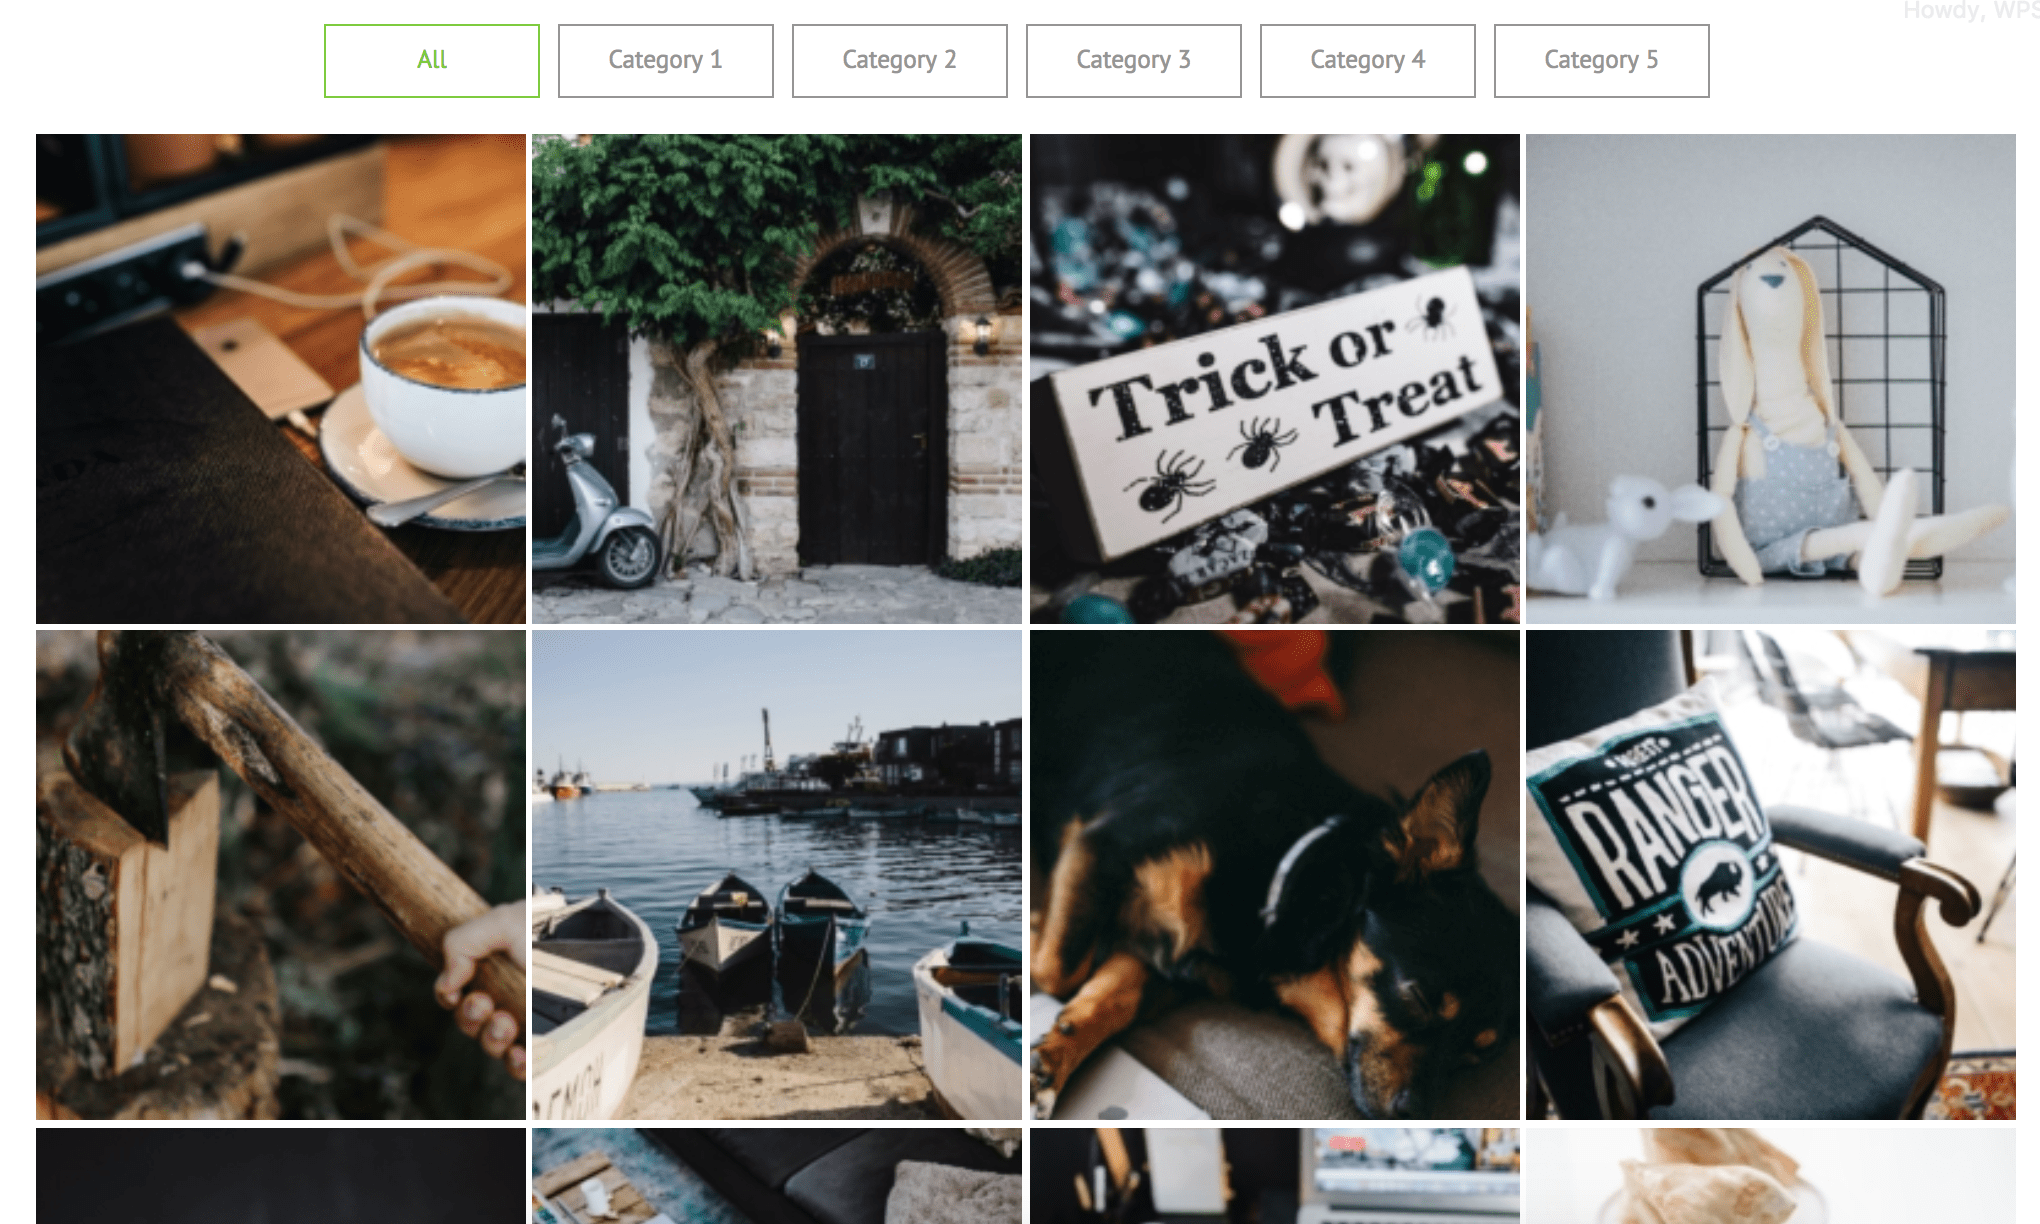
- Note: Go options/settings screen, expand "Advanced" subcategory and make sure "Show category filters" options is checked

This is the landing page's look we got on ourside.
Grid Options
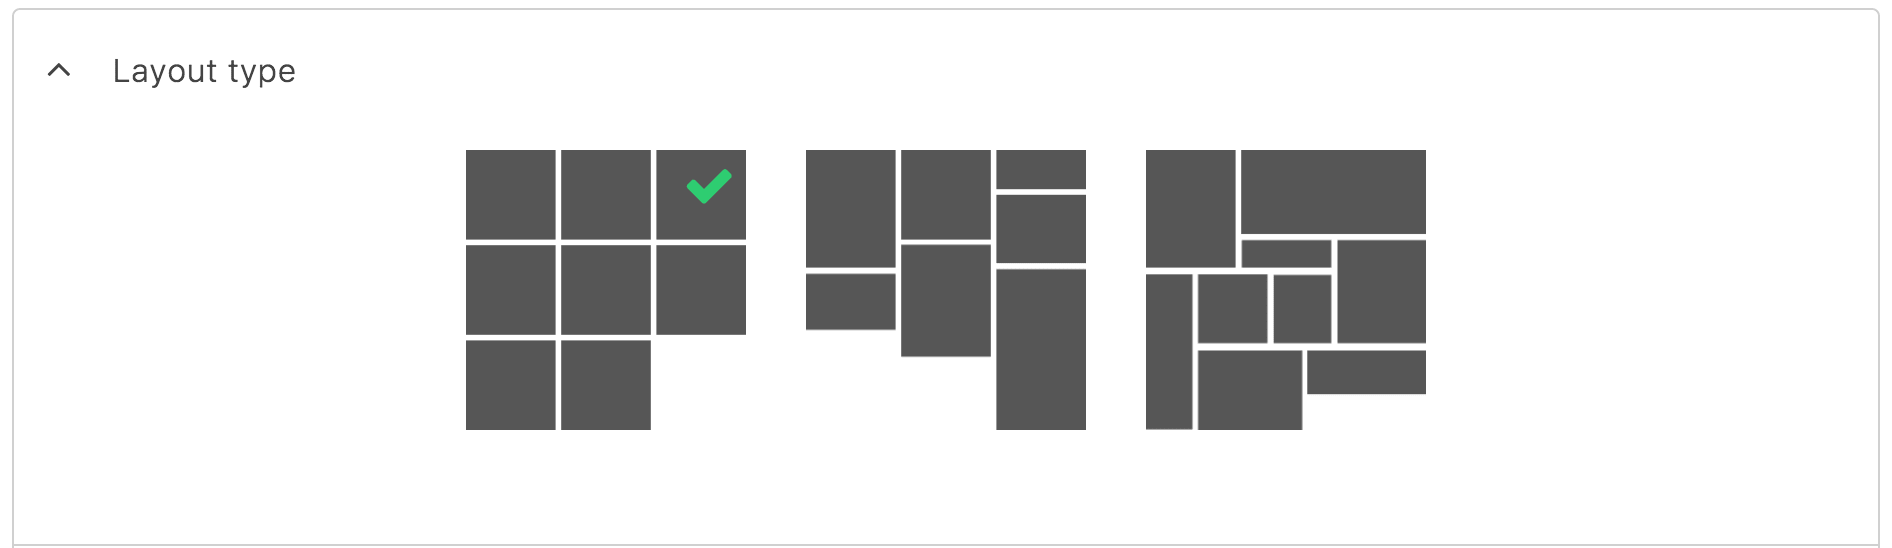
Layout Types
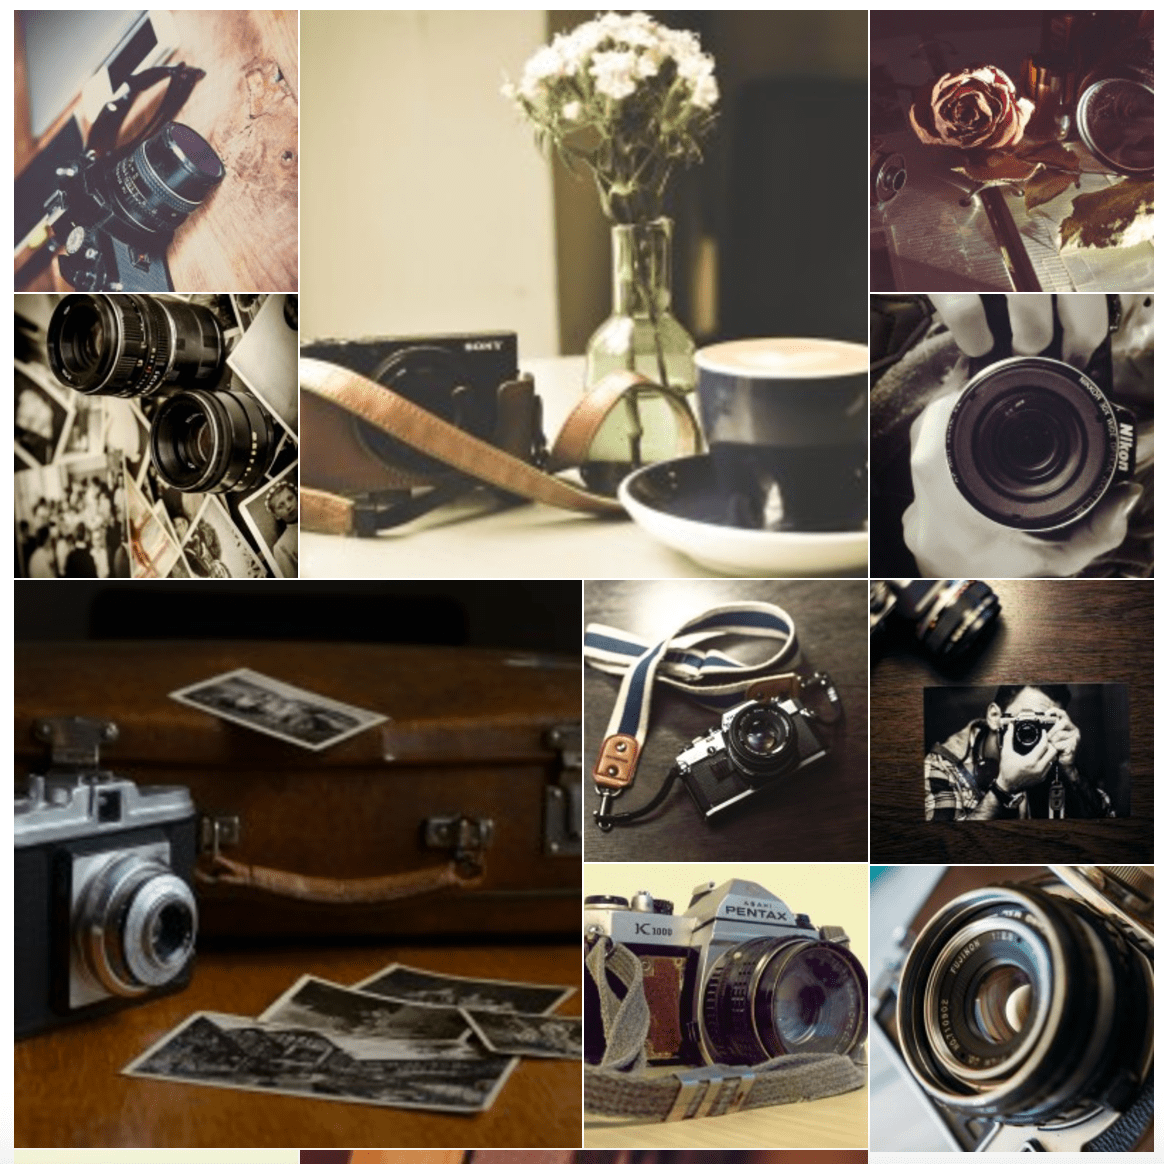
You can choose the way your grid projects are viewed. There are 3 types available - "Gallery", "Masonry" and "Puzzle" accordingly.
The grid we get with "Gallery" layout type
The grid we get with "Masonry" layout type

The grid we get with "Puzzle" layout type
Display elements
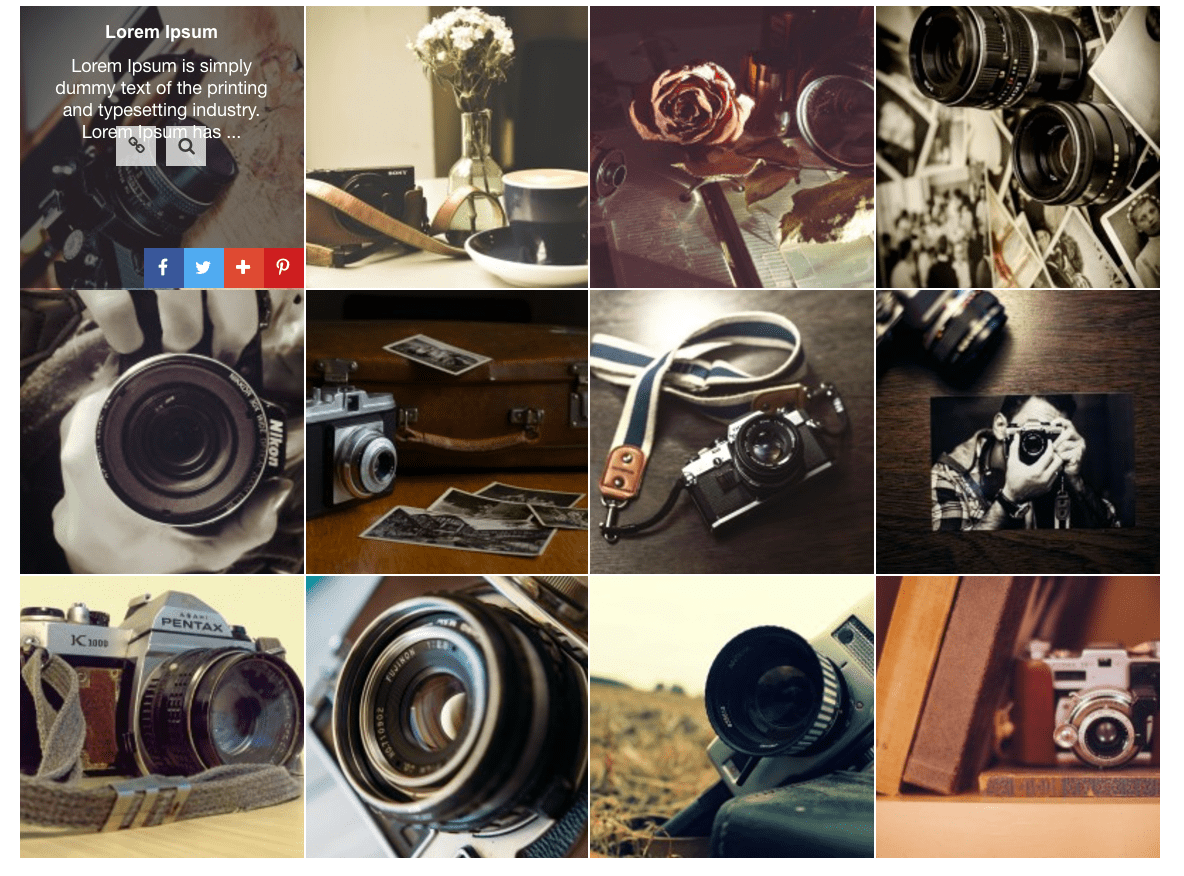
In this section you can choose which elements to hide from project's view and which to show.
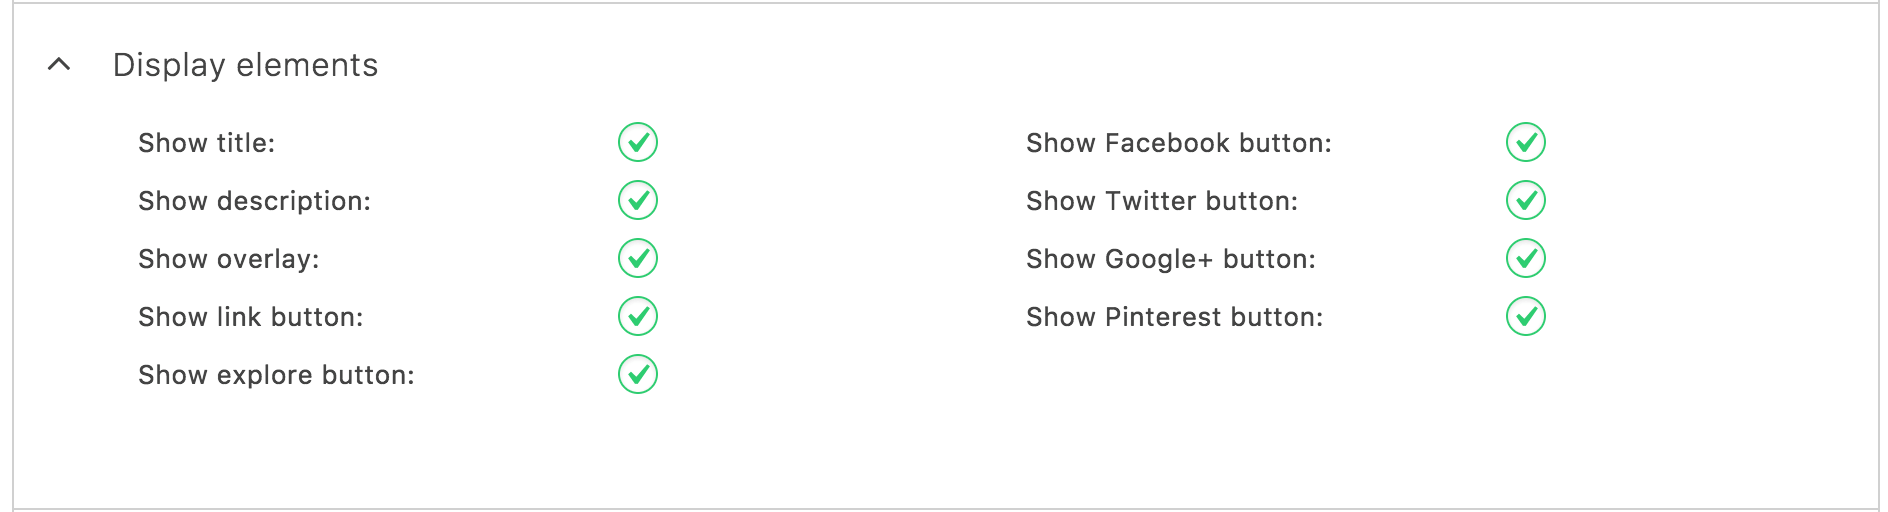
This block of settings refers to the elements in the following image:
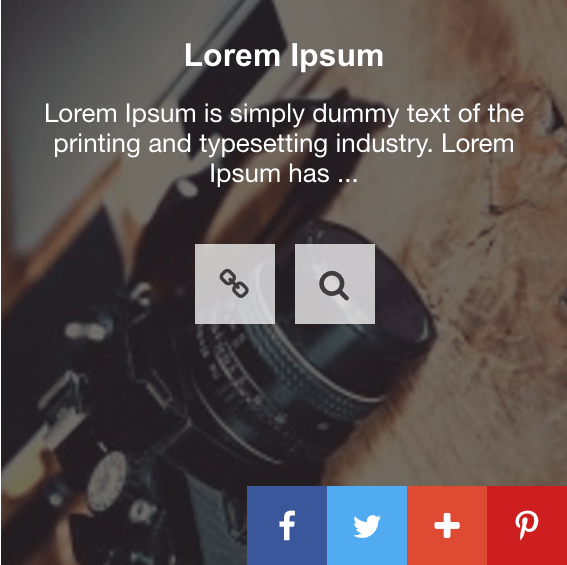
Show title - Check this option if you want to show the title of project on it, and uncheck if you don't.
Show description - Check this option if you want to show the description of project on it, and uncheck if you don't.
Show overlay - Check this option if you want to show the transparent overlay on project hover, and uncheck if you don't.
Show link button - Check this option if you want to show the button with the link of project on it, and uncheck if you don't.
Show explore button - Check this option if you want to show the explore button on project, and uncheck if you don't.
Show Facebook button - Check this option if you want to show the Facebook's share button on project, and uncheck if you don't.
Show Twitter button - Check this option if you want to show the Twitter's share button on project, and uncheck if you don't.
Show Google+ button - Check this option if you want to show the Google+'s share button on project, and uncheck if you don't.
Show Pinterest button - Check this option if you want to show the Pinterest's share button on project, and uncheck if you don't.
Styles & effects
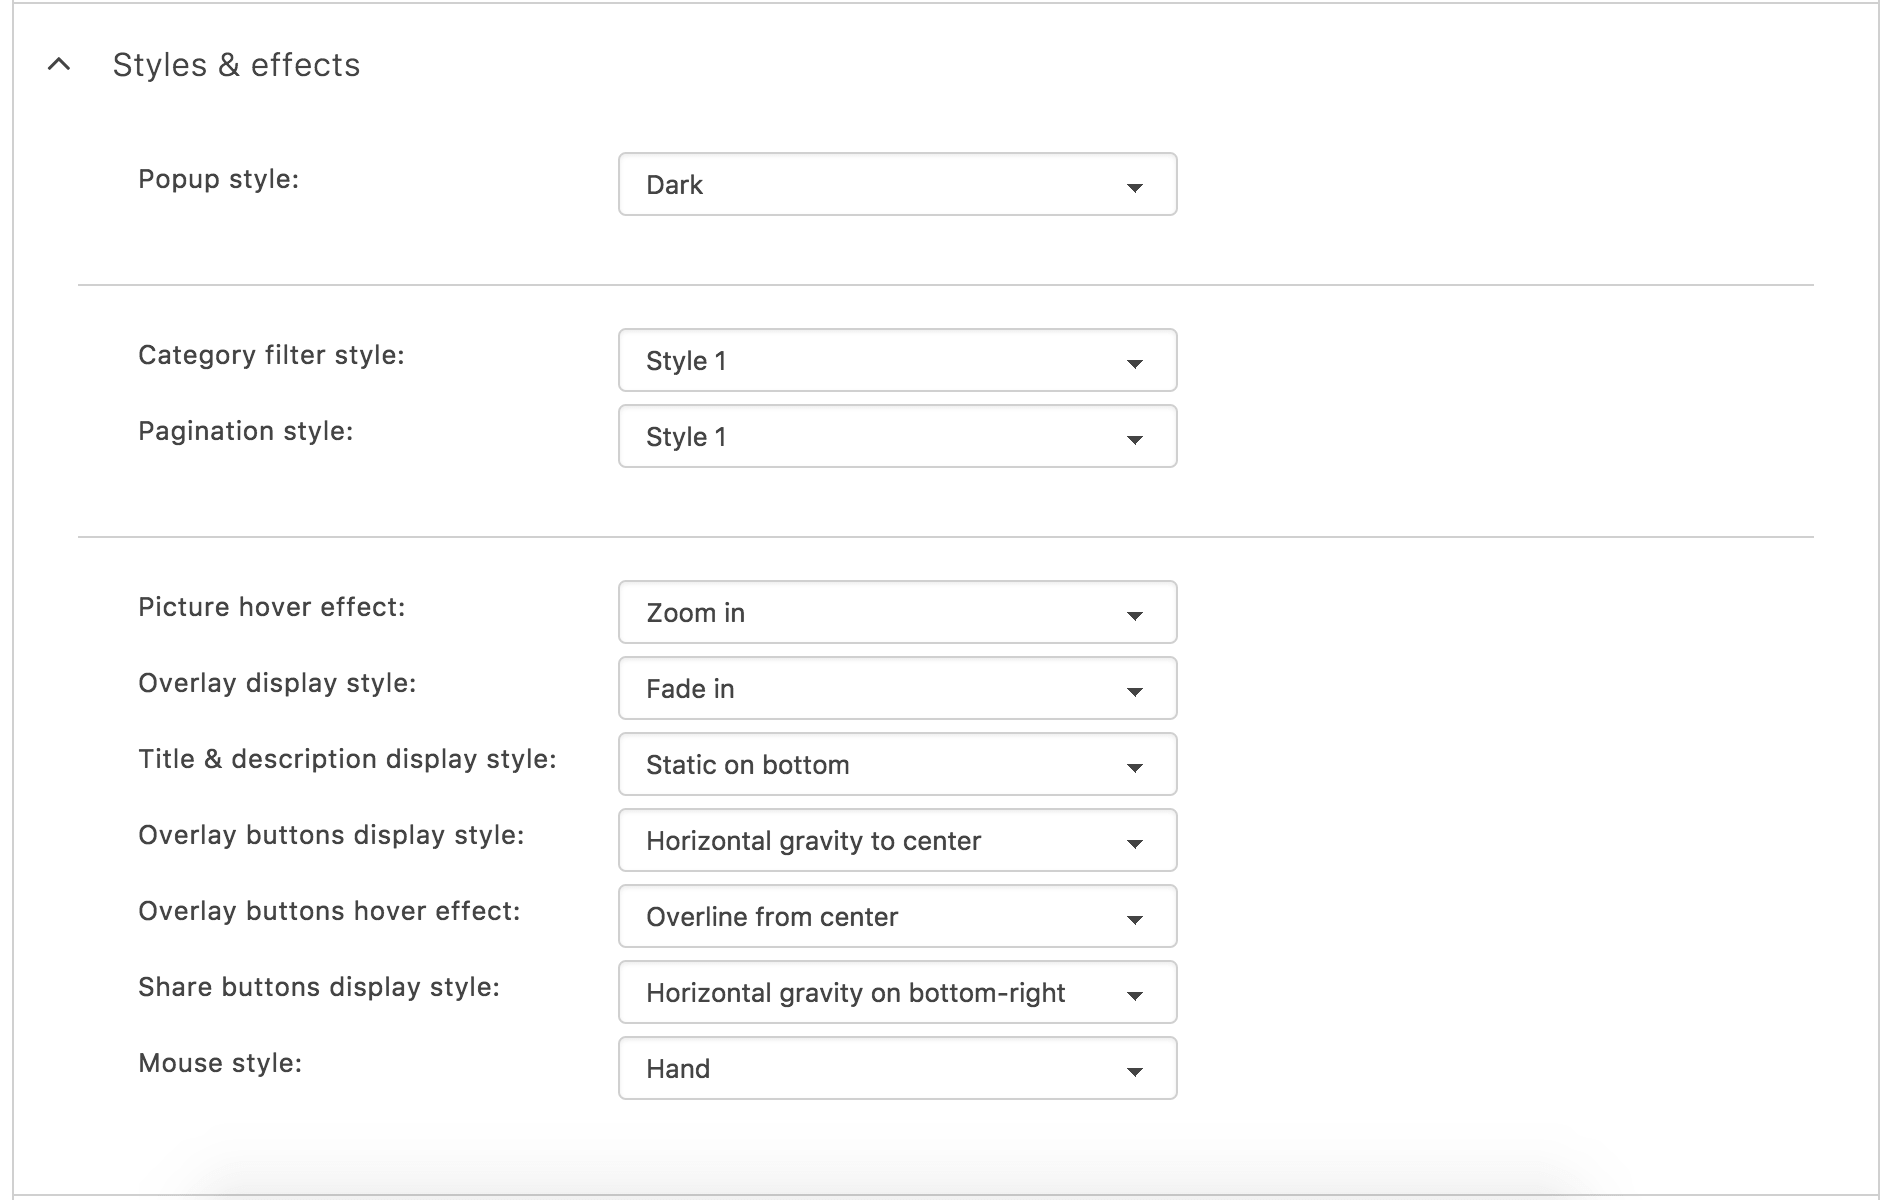
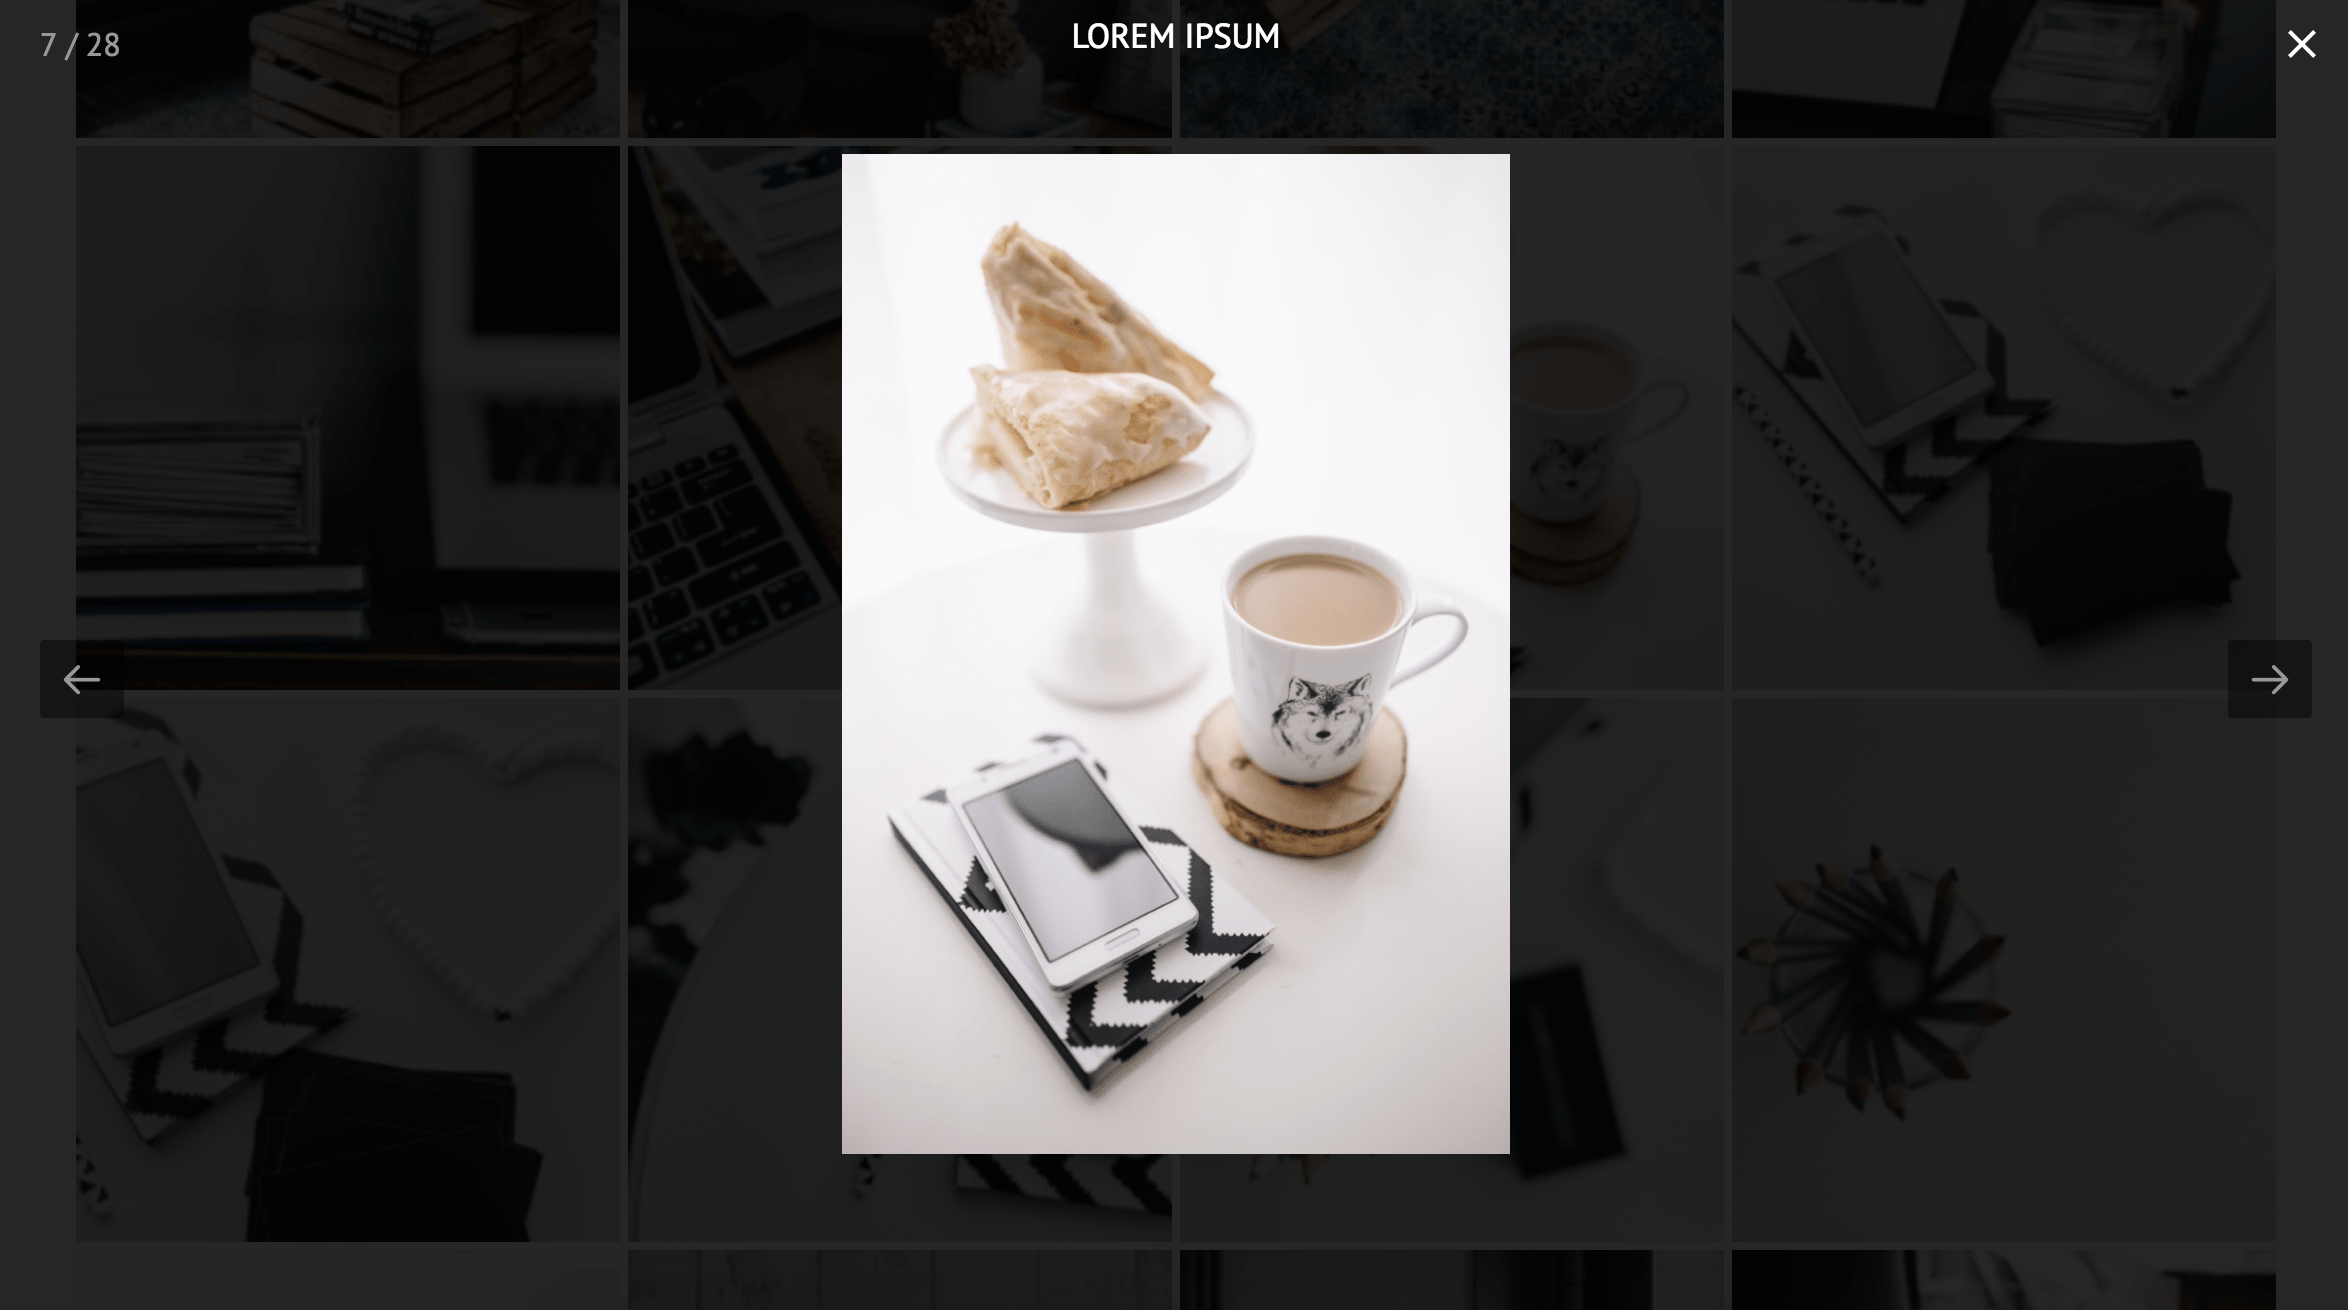
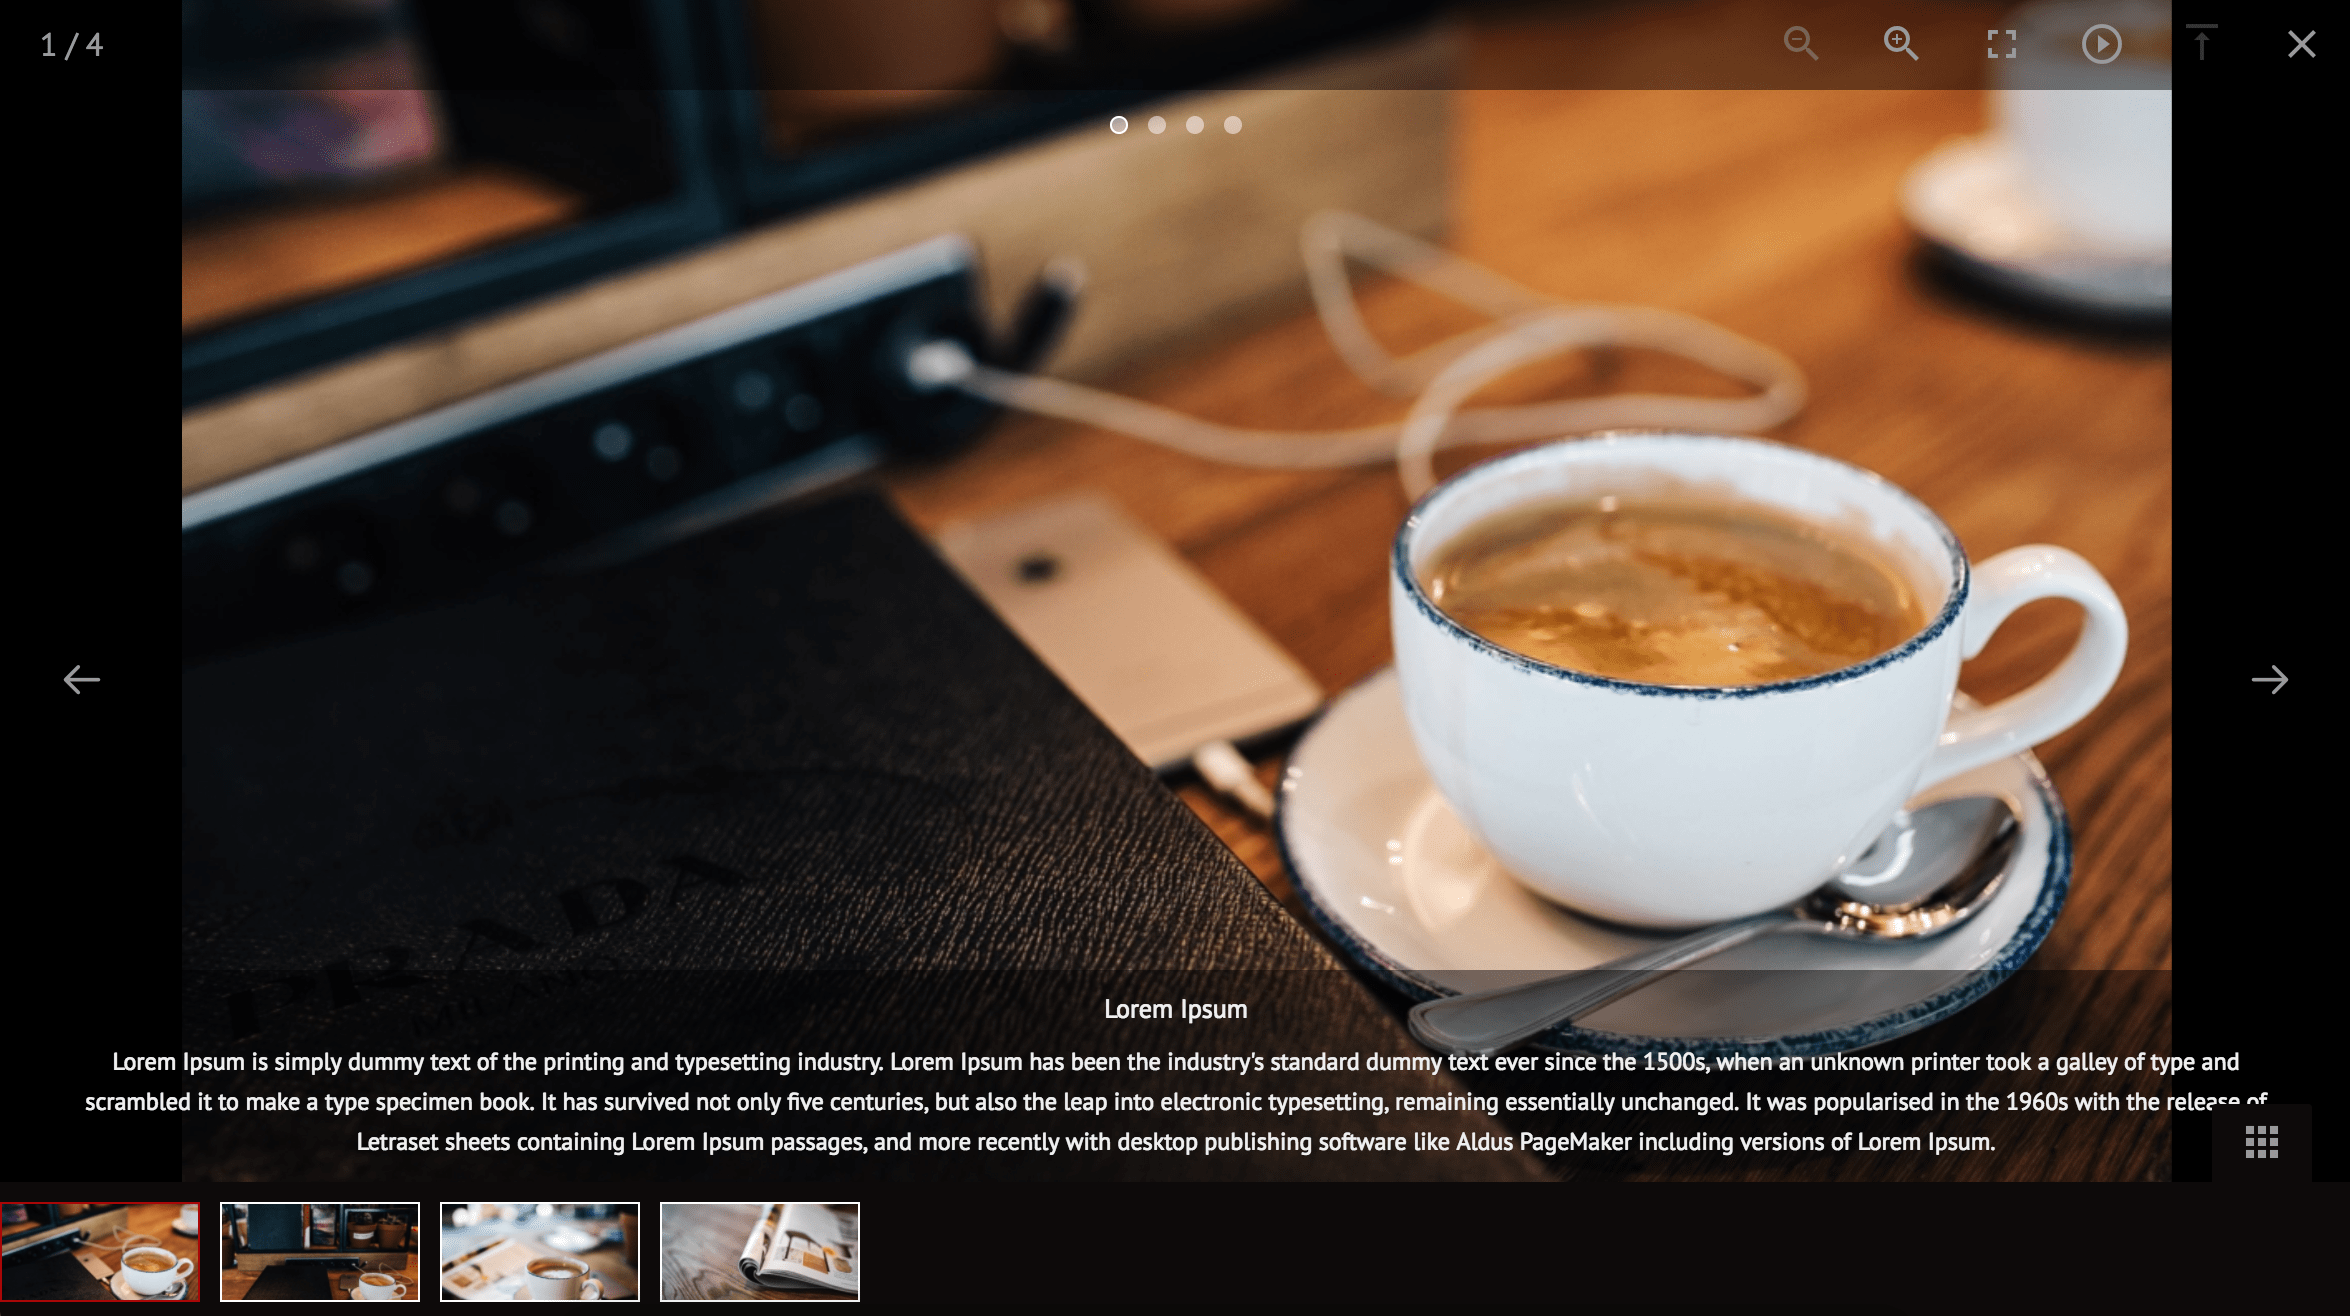
Popup style - This setting is for specifying the style of the popup in which the project displays. The following popup styles are available:
- Light (simple version of popups with minimal functionality (prev, next, and close buttons))
- Dark (the version of popup style with full functionality (prev, next, close buttons, zoom in, zoom out, slideshow..))
Category filter style - This setting is for specifying the style of category filters. The following styles are available:
- Style 1
- Style 2
- Style 3
- Style 4
- Style 5
- Style 6
- Style 7
Pagination style - This setting is for specifying the style of pagination. The following styles are available:
- Style 1
- Style 2
- Style 3
- Style 4
- Style 5
- Style 6
- Style 7
Picture hover effect - This setting is for specifying project image's hover effect. The following effects are available:
Overlay display style - This setting is for specifying project image's overlay style. The following styles are available:
Title & description display style - This setting is for specifying how project's title and description are appear. The following styles are available:
Mouse type - This is to specify the type of mouse on project hover(hand, crosshair, default).
Colorizations
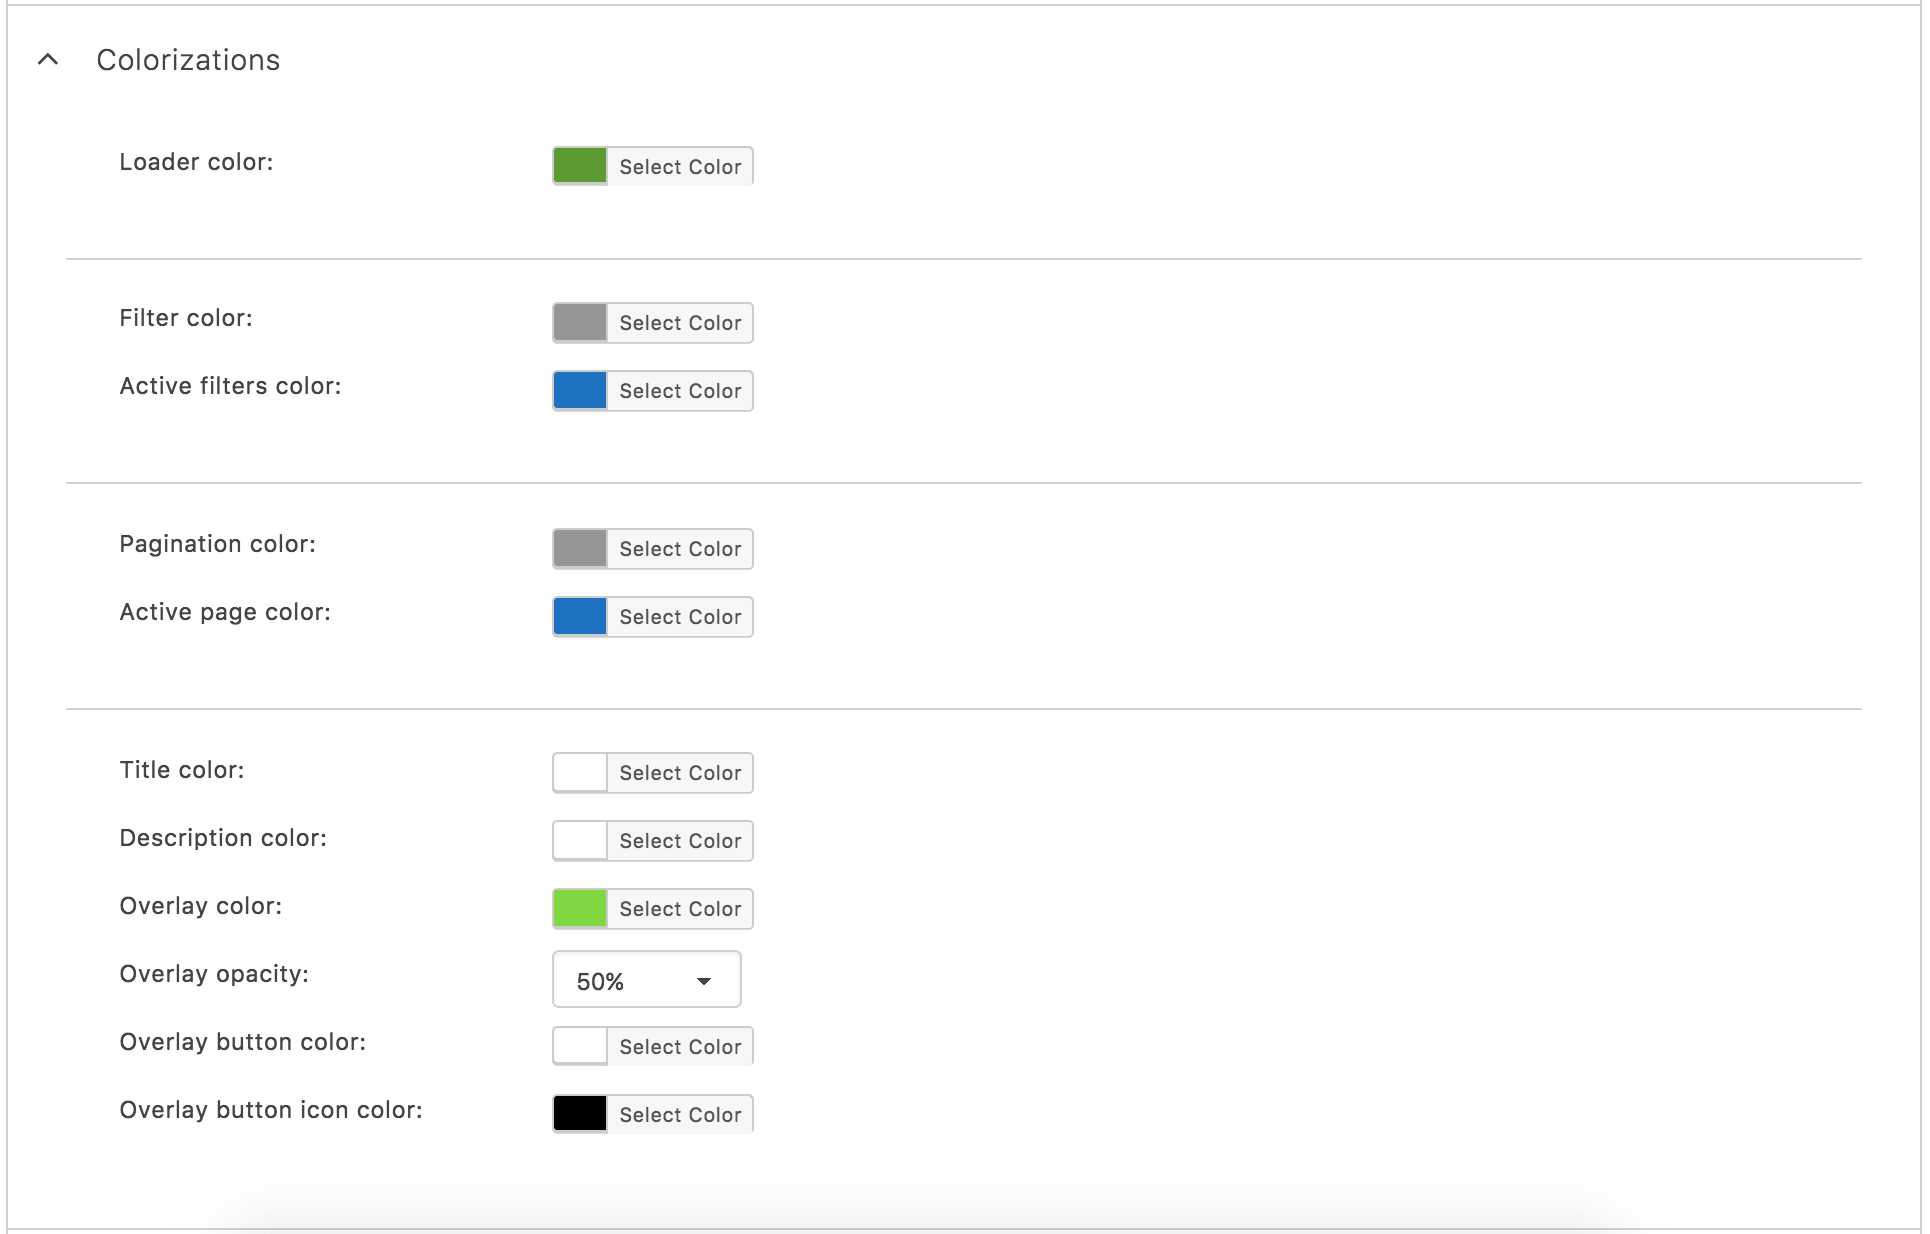
Loader color - This is to specify the color of progress bar or a spinner while loading project images.
Filter color - This is to specify the color of category filter's borders, texts, etc.
Active filters color - This is to specify the color of selected category's borders, texts, etc.
Pagination color - This is to specify the color of page number box's borders, texts, etc.
Active page color - This is to specify the color of selected page's borders, texts, etc.
Title color - This is to specify the color of project's title.
Description color - This is to specify the color of project's description.
Overlay color - This is to specify the color of project's overlay on hover.
Overlay opacity - This is to specify the opacity of project's overlay on hover.
Overlay button color - This is to specify the color of buttons on projects overlay (link, explore).
Overlay button icon color - This is to specify the color of icon on projects overlay buttons (link, explore).
Dimensions
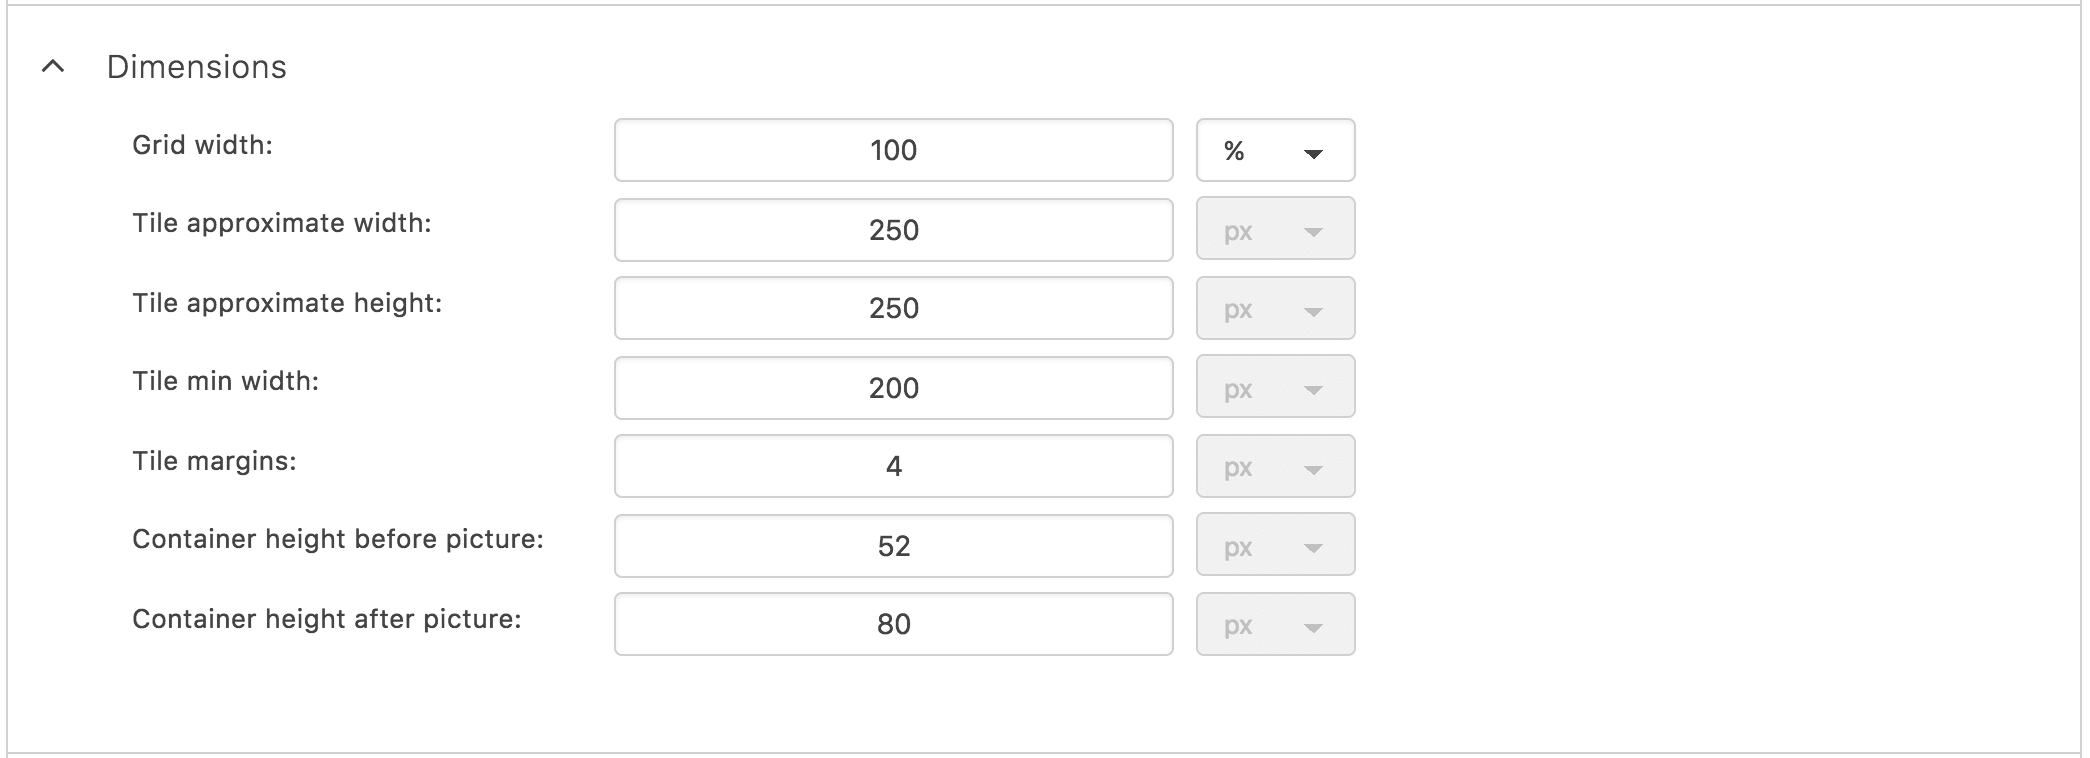
Grid width - This is to specify the width of grid. It can be specified either in pixels(px), a certain number, or in percents(%) - what percent of outer block should be the grid's width.
Tile approximate width - This is to specify the approximate width of grid's each item. (numbers less than "Tile min width" will be ignored)
Tile approximate height - This is to specify the approximate height of grid's each item. (numbers less than "Tile min width" will be ignored)
Tile min width - This is to specify the minimum width of grid's each item.
Tile margins - This is to specify the space between grid's items.
Container height before picture - This is to specify the height of a block before picture. This block appears when one of the following options are chosen as a "Title & description display style": "Static before picture", "Static after picture" and "Static title before & description after picture".
Container height after picture - This is to specify the height of a block after picture. This block appears when one of the following options are chosen as a "Title & description display style": "Static before picture", "Static after picture" and "Static title before & description after picture".
Fonts & icons
Tile title font size - This is to specify the font size of project's title appearing over project's image.
Tile description font size - This is to specify the font size of project's description appearing over project's image.
Tile title alignment - This is to specify the alignment of project's title appearing over project's image (right, left, center or justify).
Tile description alignment - This is to specify the alignment of project's description appearing over project's image (right, left, center or justify).
Tile title font style - This is to specify the font style of tile's title (normal, bold, italic).
Tile description font style - This is to specify the font style of tile's description (normal, bold, italic).
Link icon - This is to specify the link icon on project.
Zoom icon - This is to specify the explore icon on project.
For link and explore buttons the following icons are available:
Advanced
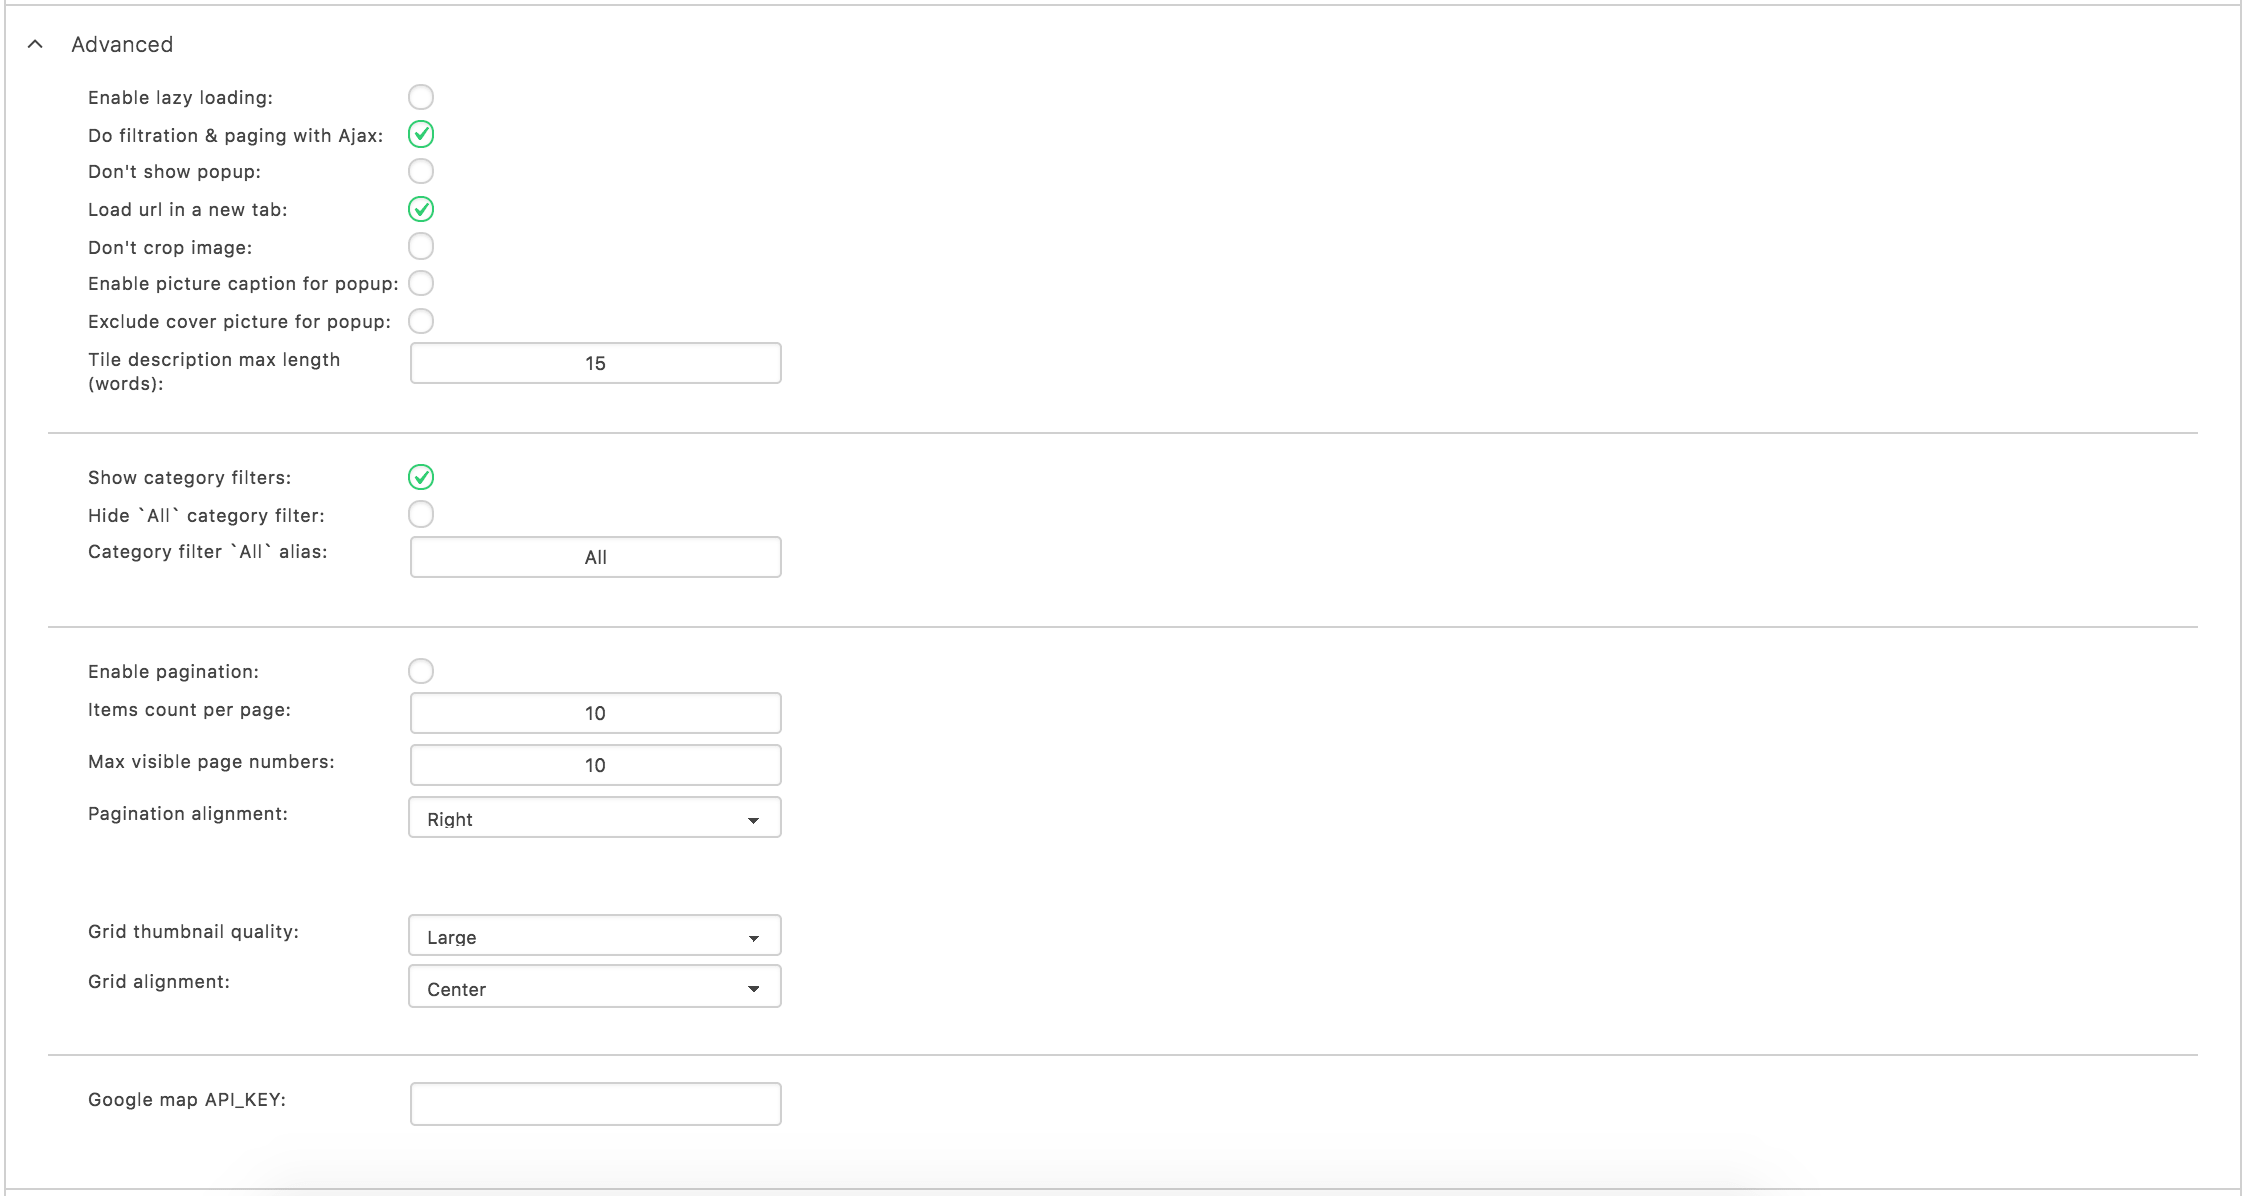
Enable lazy loading - This setting enables the lazy load of project images.
Do filtration & paging with Ajax - This setting is to specify whether to reload the page when clicking on category filters or pages or not.
Don't show popup - This is to specify to show popup on project click or not.
Load url in a new tab - This is to specify to open project's url in a new tab or not. This matters if "Don't show popup" is checked.
Enable picture caption for popup - This is to show/hide picture caption in popup view.
Exclude cover picture for popup - This is to exclude project's cover picture from popup view.
Tile description max length - This is to specify the maximum number of words to show in project's description.
Show category filters - This is to specify either to show category filters or not.
Hide `All` category filter - This is to show/hide `All` from category filter.
Category filter `All` alias - This is to change the `All` in category filter to another word.
Enable pagination - This is to enable/disable pagination.
Items count per page - This is to specify the maximum number of projects on one page. (This matters only if pagination is enabled)
Max visible page numbers - This is to specify the maximum number of visible page numbers. (This matters only if pagination is enabled)
Pagination alignment - This is to specify the alignment of page numbers(left, center, right). (This matters only if pagination is enabled)
Grid thumbnail quality - This is to specify the quality of project's image (large, medium, original).
Grid alignment - This is to specify the alignment of grid in page (left, center, right).
Google map API_KEY - This is to specify the Google map API_KEY for ability to add maps to your projects. To get an API_KEY, just follow this link and hit "GET A KEY" button. Follow the steps there and copy the KEY it gives you.
Custom CSS & JS
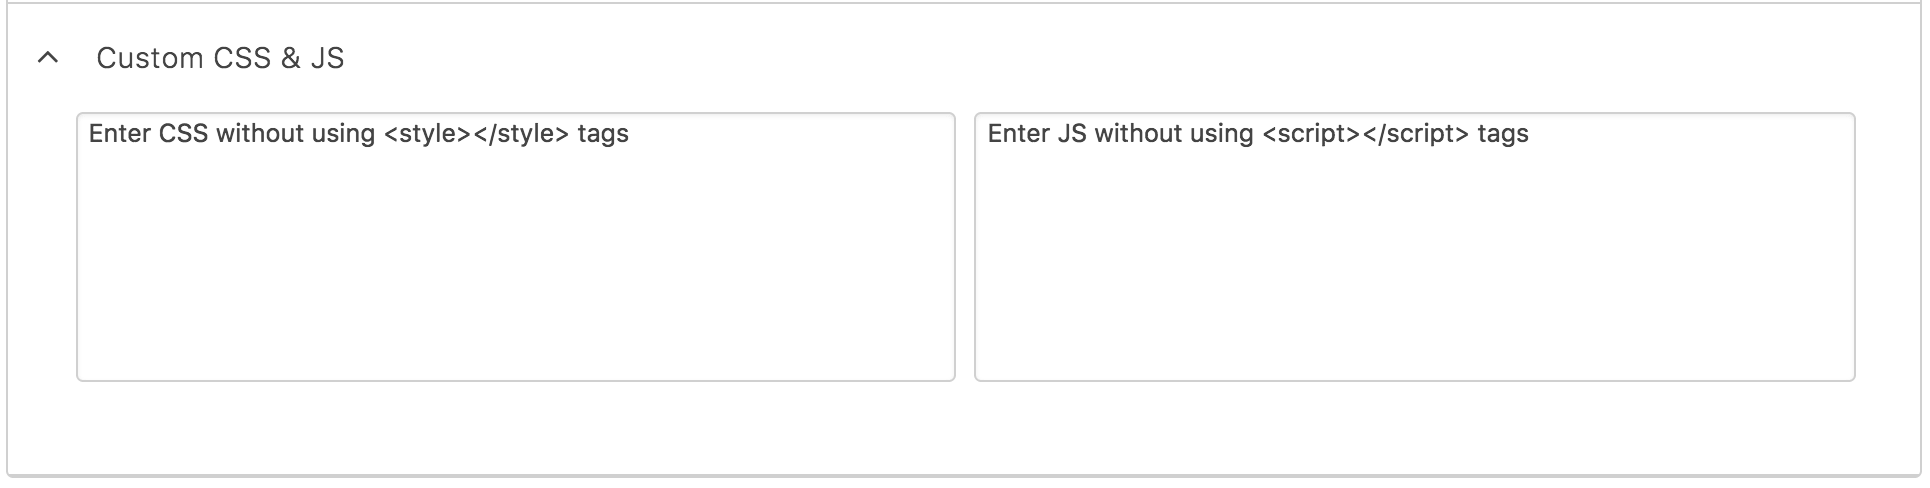
Custom CSS - Here you can put your own custom styles - css code.
Custom JS - Here you can put your own custom script - js code.